Do you need help finding something in your garage, not parking your car, since it’s so disorganised? If so, you’re in good company. The difficulty of effective and affordable garage organisation is one that many homeowners need help with. However, you need not worry; this piece will reveal many low-cost options that will turn your garage from a chaotic mess into a well-organized refuge. Put an end to stumbling over boxes and wasting time looking for misplaced items. It’s time to recover your garage without sacrificing your financial stability or mental health.
Budget-Friendly Garage Organisation Ideas
Is your garage an overflowing jumble of tools, sports gear, and who knows what else? Have no fear; you’re not your own here. Cost-effective garage organisation is a common problem for many homeowners. This essay will provide many clever, low-cost strategies for making your garage look new. You will learn how to recover your space without breaking the bank by employing ingenious storage tricks and creatively reusing commonplace products.
Garage Clutter Must Be Eliminated
If you want to get your garage in order, you must first clear out the clutter. More than any other area, this one becomes a dumping ground for useless items.
What Is the Fastest Way to Clean Out a Garage?
The quickest approach to clear a crowded garage is to have everyone pitch in. Invite a helpful brother or pal to join in (in exchange for pizza and drink afterwards), and get the youngsters involved. And remember that clearing out a cluttered garage may take more than a weekend. But it will be well worth it in the long run! Then, proceed cautiously. Check everything twice.
Spackle, Sweep, & Paint
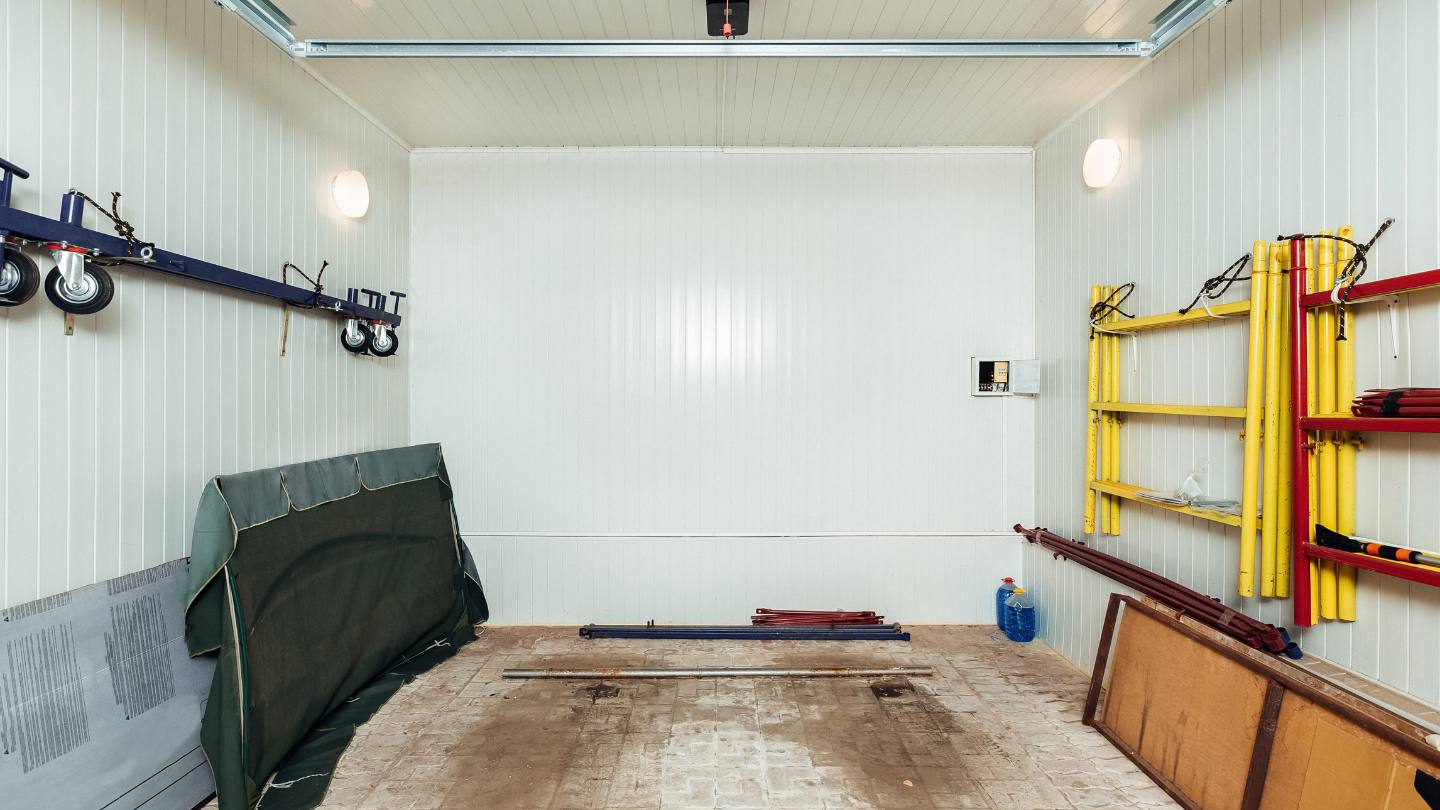
After you’ve cleared away the clutter, give every nook and cranny a thorough cleaning. Next, check out the dividers. We suggest a spackle and a new coat of white paint if they are covered in nail holes, have turned yellow from filth or age, or are currently unpainted.
Plastic Garage Shelves
Put up a couple of sets of cheap shelves along a wall to store everything from tools and toys to sports equipment and camping supplies to holiday decorations and more. You can get a variety of garage shelving units that won’t break the bank. Plastic utility storage shelves are the least expensive option.
Heavy Duty Storage Bins
You should get a decent set of sturdy bins for whichever shelving arrangement you use. The extreme summer heat and bitter winter chill can damage fragile plastic stored in a garage.
Sort and Group Like Items in Bins
Finding what you need in the shortest possible time is the ultimate goal of any well-organized garage. Sort items together, such as sports gear, camping gear, fishing gear, gardening tools, Christmas ornaments, and so on, when you have a lot of little things to organise. Bins should then be used to store the objects in “zones” on the shelves. The outside equipment may go in one section, the holiday decorations in another, etc.
Hang Your Ladders
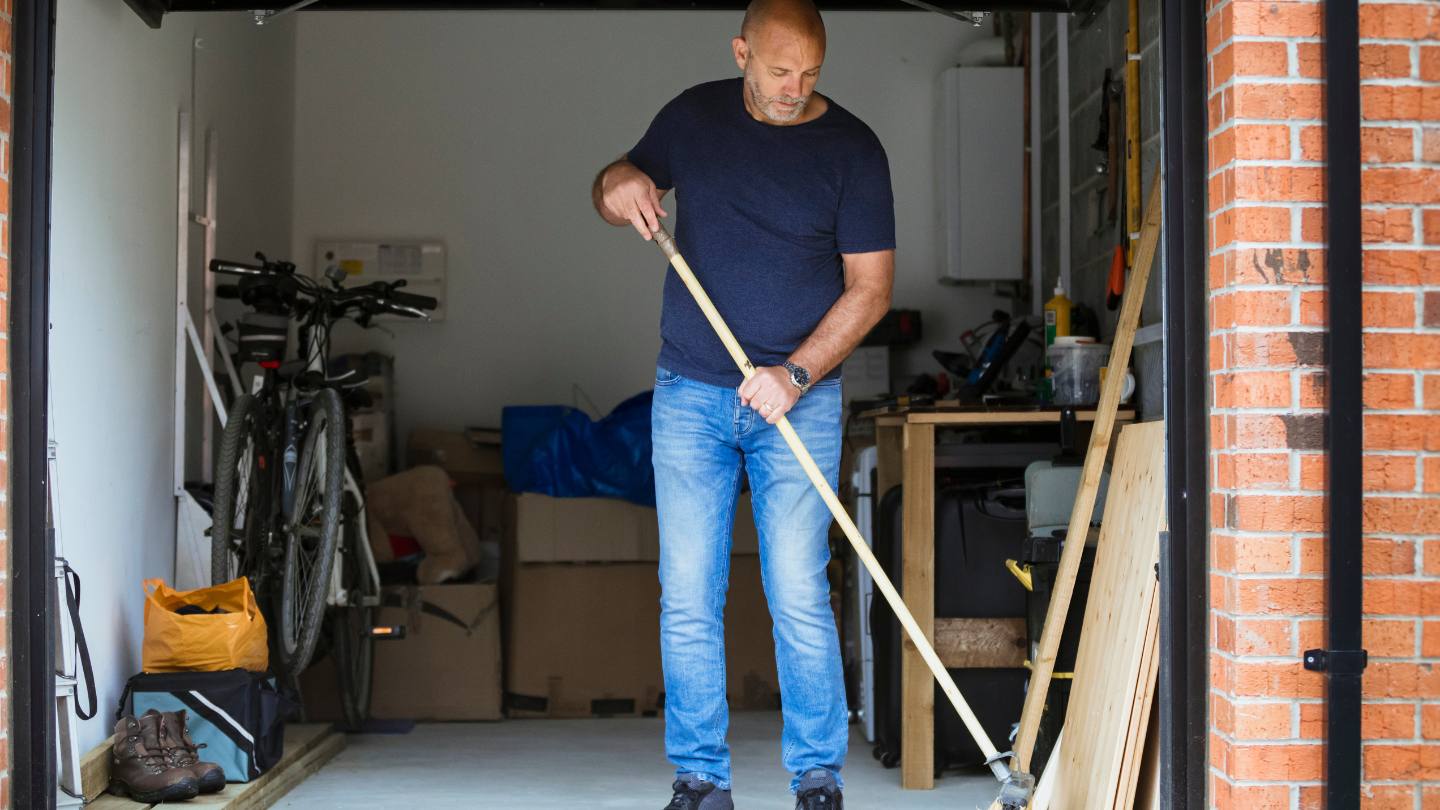
It’s great to get everything off the floor when you’re organising your garage. It maximises storage and makes sweeping and vacuuming the floor much simpler. The first step is to find a spot to hang the ladder or other large object.
Ideas For Do-It-Yourself Garage Storage
Your garage storage options can be simple and inexpensive. Some of the best answers are the ones you can find with a little ingenuity and effort. DIY storage solutions can be functional and economical, whether you’re trying to clean up a messy mess or make better use of your garage. Discover simple, inexpensive, and do-it-yourself garage storage options in this post. There is a wide variety of ideas to help you start your garage organisation project, from basic shelving to creative wall racks.
Garage Storage Racks Made of Wire
Despite their unique differences, most garages might benefit from some organisation. The walls are the most logical place to begin. Installing wall-mounted shelves is an easy way to improve your garage’s storage capacity with minimal effort. Shelving, baskets, and hooks may be hung up with minimal effort and cost, providing a wealth of organisational possibilities.
Fishing Equipment Organisation in the Garage
This easy-to-make garage shelving unit requires a 3-foot section of PVC pipe, a foam pool noodle, and some elbows.
- Create 1-inch diameter openings every 4 inches along the PVC pipe.
- Use a utility knife to make cuts in the foam noodle, 4 inches apart.
- Ensure that at least two of the slots in the pool noodle are resting on studs.
- To attach the noodle to the wall, separate the slots, insert a fender washer, and use 2-inch screws.
- Insert your fishing rods inside the PVC pipe, then screw it to the wall below it at a convenient height.
Garage Overhead Storage
Light to medium-weight seasonal items, such as camping equipment and holiday decorations, can be easily stored in the garage’s ceiling. Raise those large plastic containers from the garage floor to the upper shelves. A garage’s ceiling storage system can be assembled in a day.
- Attach 2x2s to the ceiling rafters every two feet using 3-1/2-inch screws.
- Put the 2x2s in increments determined by the bins. The bins’ lips should lightly touch the 2x2s when you slide them into place.
- Then use 2-inch screws to attach 1x4s at centre distance from the 2×2.
Flexible Garage Storage Wall
The first issue that is fixed by this storage solution is the lack of usable space created by parking your car next to the garage’s side wall. The second problem this storage system addresses is the creation of a sturdy mounting surface for shelves and hooks that can handle hundreds of pounds of things.
The answer is to build a structure out of horizontal wood strips and low-cost shelf standards. Shelving and hooks can be hung from it in practically any configuration and moved to different parts of the wall with ease.
Easy Overhead Garage Storage
Build a basic rack for storing large objects by glueing together 2-inch PVC pipes and fittings. You can use the straight pipe to hold heavy weights by bolting it to the ceiling joists, and you can use the angled sections of the ‘wye’ connectors to stabilise the rack by screwing them into the cross bracing. The PVC’s sleek exterior facilitates swift loading and unloading.
Long-Handled Tool Rack
This sturdy and straightforward tool rack is ideal for small storage. Any tool with a lengthy handle, such as a shovel, rake, or sledgehammer, can be stashed out of the way and out of sight. The device can store up to 14 objects, offering far more options and space than a few screws driven into the wall. It’s a simple solution that can be used in garages of any size.
Double-Duty Shelf Brackets
Clothes hanging rod shelf brackets have more than one use besides the closet. The bracket’s hook for holding rods is useful in the workshop or garage. The hook is flexible enough to conform to unusually lengthy objects like cords or tools.
Store Lawn Chairs
Make some simple, inexpensive, and practical wall brackets from two pieces of 14 timber (or any other scrap lumber). Reduce the length of each board by 7-3/4 inches and measure the ends at a 30-degree angle. These brackets can be used to hang chairs by attaching them in pairs to the side of exposed wall studs immediately across from each other using three 2-inch screws.
Build Big Cabinets in Place
You don’t need the skills of a cabinetmaker to construct large, durable cabinets, particularly if you do so in situ. Cabinet boxes can be easily constructed by attaching 2x2s to the wall and ceiling and plywood to the 2×2.
Add Outdoor Storage
Creating additional storage space is sometimes the greatest solution for taming garage mess. A modest locker can be a lifesaver in a cramped garage, like one used to store gardening supplies. Create a garden shed to house your equipment instead of parking it in the garage.
Cheap And Effective Ways To Get Your Garage In Order
You can still get your garage in order on a low budget, but you’ll need strategy and ingenuity. Refrain from filling your garage with useless knick knacks; instead, think of creative ways to store your belongings vertically to free up as much floor space as possible. Garage storage wall hooks are a great addition to any garage remodel because they allow you to easily and neatly hang items from the ceiling instead of dragging them across the floor.
Sort and Declutter
It’s important to tidy your garage before getting down to the nitty-gritty of organising. Divide your stuff into piles: those you’ll retain, those you’ll donate, and those you’ll throw away. The process of getting organised will go more swimmingly if you consider this.
Maximize Vertical Space
Taking advantage of the ceiling height is a great way to make the most of your garage. Mount wall shelves, hooks, and pegboards to better organise your tools, gardening supplies, and sporting equipment. The space it frees up on the ground is used well, and everything is still within easy reach.
Prioritize Accessibility
You should have quick and easy access to the things you use most often. Keep them at a convenient height for easy access. Items rarely used should be stored at the top or back of a shelf. This system of easy access will make your life much easier.
Utilize Ceiling Space
Keep the garage’s ceiling in mind while you tidy up the space. You can save money by storing seasonal things like camping gear or holiday decorations in overhead racks. It’s an intelligent way to gain usable square footage.
Opt for Multi-Functional Furniture
Assuming you use your garage for more than just parking cars, you may want to furnish it accordingly. Space-saving and multipurpose furniture options include foldable workbenches, wall-mounted tool organisers, and adaptable storage cabinets.
Regular Maintenance
Dedicate some time regularly to upkeep tasks in your garage if you want to keep it looking great. Clean-up sessions should be held semiannually or annually to ensure that everything stays in its proper spot.
The Positive Effects Of Keeping Your Garage Neat And Tidy
Listing all the benefits can help you find the drive to get started on your residential garage organisation project. When you clean out your garage, you’re not just doing it for kicks; you’re also increasing its security, making it less inviting to pests, and making it seem better all around.
Know Where Everything Is
Getting your garage in order can provide you with a comfortable space. You may finally organise your unused belongings and store them where you know they’ll be easy to discover. Once you’ve put everything where it belongs, you can stop wasting time and effort hunting for misplaced objects.
Improve Safety
Shears, saws, and other potentially lethal tools are often stored in garages. You can make your home safer if you organise your garage door in a way that prioritises security and stores all of your tools in one place.
Enhance Your Garage’s Appearance
When you’re done, you may relax and enjoy the newly decluttered and warm garage you’ve made. You will be pleased to show off your hard work to visitors and passers-by.
Items to Avoid Storing In Your Garage
It’s simple for your garage to become a dumping ground for random household items and building supplies. Avoid storing anything in your garage, as doing so could cause trouble. Some things you shouldn’t have in your garage:
- Fridge: It’s tempting to set up shop for the fridge in the spacious garage. However, given the garage’s fluctuating temperature, you may spend a lot on electricity to maintain the food inside the fridge at a constant temperature.
- Paper and cardboard: In the damp, hot garage environment, paper and cardboard quickly deteriorate. In addition to being a potential ignition source, the fragments of these items may also be just what rats and mice need to set up residence.
- Food: Cans of food should not be stored in a garage because of the high humidity levels. These items become unusable after being subjected to extreme temperatures and repeatedly freezing and thawing. It would be best if you didn’t keep things like wine in your garage because of the fluctuating temps and humidity.
- Hazardous chemicals: Take caution with any poisonous substances in your garage. If you no longer have a use for them, you should take them to a hazardous waste site as soon as possible.
Conclusion
This article provides cost-effective garage organization solutions for homeowners looking to transform their garage into a well-organized space. To start, clear out the clutter by inviting friends or family members to help. After clearing the clutter, thoroughly clean every nook and cranny, and paint any dividers if they are covered in nail holes, have turned yellow, or are unpainted.
Plastic garage shelves can be used to store various items, such as tools, toys, sports equipment, camping supplies, and holiday decorations. Heavy-duty storage bins are recommended for storage due to the potential damage from extreme weather. Sort and group items in bins to find what you need quickly. Hanging ladders or other large objects maximizes storage and makes floor sweeping and vacuuming easier.
Do-It-Yourself garage storage options can be simple and inexpensive, with ideas ranging from basic shelving to creative wall racks. Wall-mounted shelves and hanging baskets and hooks can improve storage capacity with minimal effort. Overall, these garage organization ideas can help homeowners turn their garage into a well-organized space without sacrificing financial stability or mental health.
A garage shelving unit for fishing equipment can be made using a 3-foot section of PVC pipe, a foam pool noodle, and elbows. This unit can be easily assembled and attached to the wall. For overhead storage, large plastic containers can be raised from the garage floor to the upper shelves. A flexible garage storage wall can be built using horizontal wood strips and low-cost shelf standards.
A basic rack for storing large objects can be built using 2-inch PVC pipes and fittings. The sleek exterior of the PVC allows for swift loading and unloading. A long-handled tool rack can store up to 14 objects, offering more options and space than a few screws driven into the wall.
Double-duty shelf brackets can be used for holding rods in the workshop or garage. Wall brackets can be made from scrap lumber to hang chairs. Large, durable cabinets can be built in place using 2x2s and plywood. Outdoor storage can be created by creating a garden shed for gardening supplies.
In order to get your garage organized on a low budget, it is essential to think creatively and avoid filling it with useless items. Garage storage wall hooks can be a great addition to any garage remodel.
To organize your garage, start by sorting and decluttering your belongings into piles, maximizing vertical space, prioritizing accessibility, using ceiling space, and opting for multi-functional furniture. Regular maintenance is essential to keep the space looking great and prevent pests from entering.
Organizing your garage not only provides a comfortable space but also improves safety by storing potentially lethal tools in one place. Regular clean-up sessions can help keep everything in its proper spot.
When organizing your garage, avoid storing items like a fridge, paper and cardboard, food cans, and hazardous chemicals. Keep these items out of the garage due to fluctuating temperatures, high humidity levels, and potential ignition sources.
Additionally, avoid storing items like wine in the garage due to the fluctuating temperatures and humidity. Instead, take them to a hazardous waste site if they no longer have a use. By focusing on these steps, you can create a more organized and functional garage that is both functional and safe for you and your family.
Content Summary
- Many homeowners struggle with organising their garages effectively.
- Affordable solutions can transform chaotic garages into organised spaces.
- The ultimate goal is to reclaim your garage without financial stress.
- Many garages become cluttered with miscellaneous items over time.
- To organise a garage, one must first declutter it.
- After decluttering, the garage should be thoroughly cleaned.
- A fresh coat of white paint can refresh and brighten the garage walls.
- Affordable plastic shelving can be an effective storage solution.
- Heavy-duty bins are essential for enduring fluctuating garage temperatures.
- Grouping like items in bins facilitates quicker and easier access.
- Wall-mounted storage can maximise space and keep the floor clutter-free.
- Ladders and large tools should be hung to free up floor space.
- DIY storage solutions can be both cost-effective and functional.
- Wall-mounted shelves can significantly increase storage space.
- Creative solutions, like PVC pipe structures, can organise fishing equipment.
- Overhead storage makes use of the often-ignored ceiling space.
- Organising tools by type and size helps streamline garage activities.
- Simple wooden brackets can effectively store lawn chairs.
- Large cabinets can be built directly in the garage, even without advanced carpentry skills.
- Outdoor storage solutions can help declutter cramped garages.
- Sorting and decluttering is the foundational step in any organisation process.
- Vertical storage solutions can free up a significant amount of floor space.
- Frequently used items should be easily accessible.
- Ceiling racks are ideal for storing seasonal or rarely used items.
- Multi-functional furniture can enhance the garage’s utility.
- Organising strategies should prioritise space-saving and accessibility.
- Wall hooks provide an easy way to hang items and keep them off the floor.
- Budget-friendly garage solutions don’t necessitate sacrificing quality.
- Reusing everyday products creatively can aid in garage organisation.
- Tidying a garage may require more than a single weekend but is worth the effort.
- Paint can help conceal imperfections and refresh the garage’s appearance.
- Storing items in zones on shelving makes for an organised system.
- Making the most of wall and ceiling space can drastically change the look and feel of a garage.
- Even with a tight budget, strategic planning can make a big difference.
- Pegboards are versatile tools for hanging a variety of items.
- Overhead garage storage is a savvy use of space for infrequently used items.
- Garage floors should be kept as clear as possible to enhance safety and functionality.
- It’s essential to choose storage solutions that match the garage’s primary use.
- Donating or discarding unnecessary items can significantly reduce garage clutter.
- Durable storage bins are a must for protecting items from environmental damage.
- The garage’s ceiling is often an underutilised storage space.
- Wire storage racks offer a mix of durability and adaptability.
- Simple and inventive DIY solutions can be just as effective as store-bought systems.
- Homemade wooden brackets are an affordable storage solution for various items.
- Ceiling-mounted storage bins provide extra space for larger or seldom-used items.
- Grouping items based on function and frequency of use can streamline tasks.
- Investing in garage organisation can save time and reduce stress in the long run.
- Creative reuse of common items, like PVC pipes, can offer unique storage solutions.
- Garages can be both functional storage spaces and aesthetically pleasing areas.
- Adopting a systematic approach to garage organisation can yield lasting results.
Frequently Asked Questions
How Can I Organise My Garage Cheaply And Efficiently?
Wall shelves, pegboards, and ceiling storage alternatives can help you save money and better use your space. These options make smart use of vertical space so your ground level stays clutter-free.
Do Small Garages Have Affordable Storage Options?
For small garages, utilise compact storage solutions like stackable bins, magnetic tool strips, and foldable workbenches. These options save space and keep your garage organised.
Do Any Diy Garage Organisation Tasks Cost Less?
Absolutely! Reclaimed wood, cinder blocks, and PVC pipes can all be used to construct one-of-a-kind storage cabinets or shelves. These do-it-yourself tasks are easy on the wallet and open to personalisation.
How Can I Clear My Garage Without Buying Expensive Storage Containers?
Getting rid of clutter doesn’t have to break the bank. If you need help keeping your smaller belongings in order, try reusing some of your old crates, cardboard boxes, and glass jars.
What Are Some Cheap Garage Storage Options For Sports And Outdoor Gear?
To keep your sports gear organised and easily accessible, repurposing an old bookshelf or investing in a cheap sports equipment rack.