While waterproofing your garage may not be on your radar, it has probably had moisture issues, especially if it’s an exterior detached garage or adjoined to your house. The waterproofing of a garage is often overlooked during its construction, and its quality could be better than that of the main house.
Because they only have one layer of skin, garages aren’t usually designed to create a completely dry climate suitable for living in, making them susceptible to moisture.
However, more and more of us wish for larger living quarters or more storage space at home. Adding living space to one’s garage is becoming more commonplace when, in the past, most people saw their garage as a spot to park their car. Nonetheless, consider waterproofing your older garage on your own if it’s leaking.
Garage Waterproofing
The interior walls of your garage, whether an attached garage or an outside garage, have become slightly moist at some point. This may happen or worsen if you develop behind your garage or your neighbours have buildings on higher ground. Typically, this is when individuals start considering alternatives for waterproofing a garage.
In most garage construction projects, waterproofing is seen as a partial must. Most garages are single-story structures, which could better house a dry atmosphere. But because of space constraints, many of us want to use our garages well and keep as much as we can there without worrying that it will get wet.
Applying tanking slurry to the garage walls is a cheap and effective way to keep water out. Tanking slurry is great for preventing groundwater from entering basements and cellars and works wonders for keeping walls in garages dry. When it comes to waterproofing a garage, it is the most cost-effective and efficient option.
If done well, this strategy will keep your garage’s contents safe, and you may even utilise it as extra storage, a home office, or both. In this straightforward tutorial, we’ll show you how to waterproof a garage using tanking slurry.
Options For Waterproofing
When protecting your garage against water, you have a few choices. Some examples are;
- Crystalline concrete mixture additive – No further reapplication is necessary because this is a long-term fix. As they develop with the concrete, the crystals seal any cracks or holes, making the material impermeable. If cracks ever occur, the crystals may be reactivated to fill and restore the waterproofing.
- Epoxy or waterproof paint – Paint or epoxy can be applied immediately to floors and walls; after a few days, it must be cured.
- Waterproof covering – When building a garage, this is put on the underside of the concrete slab to stop water from getting there.
- Polypropylene floor tiles for garages – These tiles can withstand the effects of water and spills.
Although each approach has advantages, “tanking” is the most reliable way to waterproof garage walls.
Why Is Waterproofing A Garage Important?
With regular maintenance, the average garage can endure for 75 years, but a garage left unattended for an extended period may only live for a third of that time. If you want your garage to last as long as possible and function at its best, upgrade the waterproofing system every 7–15 years. This is because the system is vital to the system’s entire operation.
Major degradation and very expensive building repairs might result from poorly managed water.
To keep your parking garage dry, waterproofing solutions do the following:
- Keeping its internal steel structure from rusting
- Preserving the integrity of the joints between surfaces, walls, and fittings
- Sealing up spaces where water can seep into the building
Improving the overall experience for guests is just another perk of waterproofing systems. Dripping mineral-rich water onto passengers’ automobiles, for instance, maybe the result of a leak from one level to another. Customers will be very dissatisfied if this water damages the paint and finishes on their automobiles. In addition, a well-designed drainage system and waterproofing prevent water from pooling in particular parking spaces after a hard storm, allowing you to make the most of your garage space.
Various Kinds Of Waterproofing Techniques For Parking Garages
Although some are more effective than others, the goal of any waterproofing system is to keep water out of your garage. When choosing the right coating for your garage, it’s important to consider sealers, sealants, and traffic coatings (also called parking deck coatings).
The design of your garage might also affect the waterproofing systems available to you. For instance, waterproofing at the joints is paramount for precast constructions designed in a factory and installed on-site. Because the internal steel reinforcement of cast-in-place parking garages is susceptible to rust and corrosion, replacing the sealants and coatings when worn out is essential.
Sealants For Parking Garages
A concrete sealer is a waterproofing compound that seeps into the material. Many sealers resist winter maintenance or severe temperature variations since they are buried below the surface. They are expected to last for around ten years. Covering a large portion of your parking structure with sealer may prevent the concrete and its internal reinforcement from deteriorating.
Unlike surface-level traffic coatings, this waterproofing system provides optimum protection without obstructing the view of the structure’s concrete during assessments and inspections. This is the primary advantage of the system. That way, damage may be detected and treated before it becomes worse instead of going unnoticed and getting worse over time.
Sealant For Parking Garages And Expansion Joints
Joints are sealed with sealants so water doesn’t seep into other building areas. Polyurethane and other elastic joint sealants wear down and crack over time. Therefore, it’s important to replace them at regular intervals. Joint sealants have a service life of 10-15 years in a parking structure, but that lowers to 7-10 years in environments with severe temperatures or ultraviolet radiation, such as roofs.
On top of that, your house may flex and extend with the help of expansion joints, which are specialised joints. Compression seals, a part of this garage waterproofing system, may safeguard your house in places where normal joint sealants would be vulnerable to physical movement.
Water may seep into any building, including cast-in-place ones, through expansion joints or the spaces between walls and floors. This is especially true with precast parking garages. So, to keep your garage in excellent condition, applying joint sealants and maintaining expansion joints is necessary.
The Covering Of The Parking Garage Floor
Waterproofing systems that sit on top of your building, also known as traffic or deck coatings, are an alternative to sealers, which penetrate the concrete. Surfaces that sustain traffic should not be coated with topical traffic materials, such as paint systems, since they only protect your building’s concrete floor from the weather.
While traffic coatings may be the most convenient and inexpensive short-term fix, they won’t stand up to the test of time. Winter maintenance may be quite hard for parking garage floor coatings. A traffic coating is a concrete surface scuffed and scraped by snowploughs as they remove ice and snow. The traffic coating is also being damaged, unfortunately.
Because of this degradation, water may penetrate the coating, and the system that was supposed to protect the floor is now causing it to deteriorate even more by retaining water. Additionally, specialists need help seeing this degradation during regular examinations due to traffic coatings covering the concrete underneath.
Methods To Make Garage Walls Waterproof?
Throughout the night, it has rained. There is a lot of water on the ground near your home. As if that weren’t discouraging enough, you enter your garage and see water seeping in from behind the wall. The walls of your garage need to be waterproofed. Nevertheless, what is the best way to make garage walls more watertight?
When building a house, waterproofing the walls is a must. However, time travel is not an option. It would help if you thus did your hardest right now. Now more than ever, a systematic, step-by-step approach is the way to waterproof your garage walls:
Step 1: Tracking Down The Source
Subsurface water pressure is the most likely explanation for the water seeping into the garage from behind the wall. The failure of the perimeter drainage system and the recent severe rains are the root causes of the waterlogging. It could not be rain but water leaking out of a tank or pond.
Look around to see if any other rooms are getting water as well. In particular, look in the basement. Your home’s foundation was probably merely “damp proofed” and not “waterproofed” if that’s the case. On the other hand, a localised concern is water seeping under the garage wall. Damage has occurred to the perimeter drainage system or the waterproofing around the house’s foundations. You are faced with a dilemma regardless of the cause.
Step 2: Drilling A Trench
The house’s façade is the source of the problem. Plus, you need to fix it at that location. An important part of every building is its foundation, which rests on a footing. Soil excavation in the leaking zone adjacent to the foundation must thus be the first order of business. You need to excavate a trench that exposes the footing and the complete foundation.
The French Drain System must be exposed if it is already in the house. Checking for obstructions, breaks, leaks, etc., in the French Drain is necessary. In the absence of an existing French Drain System, the width of the trench must be sufficient to include a new system.
Step 3: Washing With Pressure
Clean the exposed area with a pressure washer after exposing the foundation wall and some of the footing. Verify that the mud is thoroughly removed, specifically where the foundation wall meets the footer. This might show that the foundation wall directly above the junction is cracked or has holes.
Hydrostatic pressure occurs when there is an excess of water in the soil, causing water to be forced into your garage. Regardless, the foundation wall—made of concrete or masonry—is permeable. Capillary action, often known as wicking, causes water to rise within the wall.
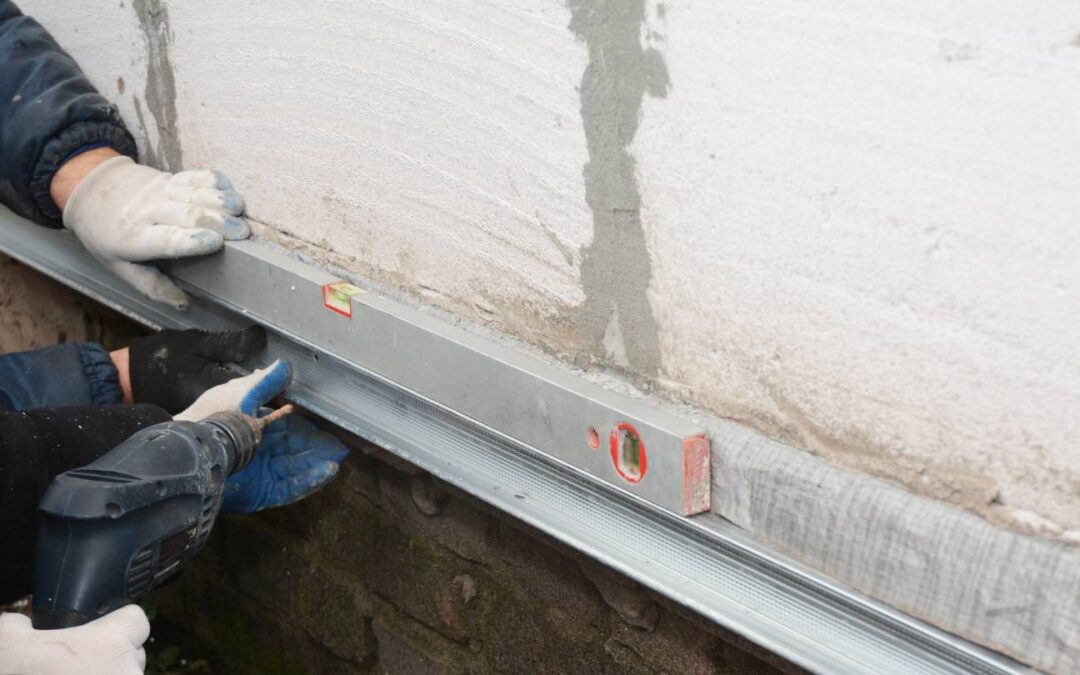
Step 4: Make The Garage Wall Waterproof
If dirt or dust is stuck at the seam between the foundation wall and the footer, you may dry it up and remove it using a blower. A cementitious water plug should fill the gaps, bigger fractures, and holes at the junction. Polyurethane, silicone, or acrylic sealer should be used to fill the cracks in the foundation wall.
Lastly, generously spray the whole foundation wall with liquid rubber foundation and basement sealant, being sure to reach every inch, from 6 to 12 inches above soil level to the bottom of the exposed footer level.
Step 5: Installing The French Drain
The French drain, or the perimeter drain, is perfectly level around the home or garage. It collects and stores rainwater to maintain the water level below the foundation wall and footer joint.
A perforated pipe drain installed in the perimeter trench does this. The following procedures must be followed.
- Place a filter cloth in the drain with enough excess on both sides.
- Spread out two to three inches of pebbles on the filter cloth.
- On the gravel, place the pipe drain.
- Make sure the holes in the perforation point are downhill.
- Pour additional gravel over the drain pipe.
- Lay the additional filter cloth over the gravel.
- Prior to installation, check that the drain pipe’s top is lower than the connection between the foundation wall and footer.
If it is done correctly, rainwater will swiftly enter the perforated drain pipe via the gravel and topsoil.
Step 6: Establishing A Storm Water Drain Connection
The French drain must be connected to the stormwater drain or another location where water may be absorbed in the soil without putting hydrostatic pressure on the walls of the home or garage.
Digging a long, deep trench that progressively slopes down from the perimeter to the stormwater drain is necessary. A pipe has to be connected and routed through this trench.
The plan is to transfer water from the french drain to the stormwater drain using gravity. All of the excavated trenches may now be backfilled.
Mould
If, even after waterproofing your garage, the things you store inside remain wet and smell strange, it may be a sign that you have a mould problem. It should be thoroughly cleaned of mould since it poses a health risk if it has inadequate ventilation and little natural light.
Because it is harmful, mould can worsen pre-existing conditions like allergies or asthma in addition to causing new ones. If mould growth is detected, your garage must be completely cleaned using hydrogen peroxide or distilled white vinegar. You must use appropriate protection gear, such as a mask, gloves, and glasses.
Conclusion
Garage walls may get a little wet, particularly if they are next to or related to another structure. Although waterproofing is frequently disregarded when building a garage, it is crucial to preserve the garage’s condition. Tanking slurry is an economical and practical way to maintain the dryness of garage walls.
Polypropylene floor tiles, epoxy or waterproof paint, crystalline concrete mixture addition, and waterproof coating are some of the choices available for waterproofing. The most dependable method for waterproofing garage walls is tanking.
For the typical garage to survive 75 years with appropriate maintenance, waterproofing is essential. Negligent water management can result in significant deterioration and costly building maintenance. Waterproofing solutions maintain the integrity of joints between surfaces, walls, and fittings, stop the internal steel structure from rusting, and seal up any openings where water may seep into the building—all of which contribute to keeping your parking garage dry.
For parking garages, different kinds of waterproofing methods include sealers, sealants, and traffic coatings. The waterproofing options that are available, including factory-built precast structures that are erected on-site, may vary depending on how your garage is designed.
Concrete sealants are a type of waterproofing compound that penetrates the substance and has an approximate ten-year shelf life. To stop water from leaking into adjacent building spaces, sealants are also necessary for parking garages and expansion joints.
Waterproofing is essential to preserving your garage’s durability and functionality. You can guarantee that your garage stays dry and secure for many years to come by selecting the appropriate coatings, sealers, sealants, and traffic coatings.
After waterproofing, thoroughly clean the garage using distilled white vinegar or hydrogen peroxide while wearing the proper safety gear if mould still persists. Townhouse communities necessitate a cooperative approach to maintenance since they combine individual proprietorship with shared responsibilities.
In addition to establishing guidelines, scheduling deadlines, and allocating cash for the community, HOAs oversee and manage maintenance projects for their members. This cooperative funding plan enables communities to take on large-scale projects like exterior repairs, landscaping, and improvements to common areas, guaranteeing a consistent and improved standard of living for inhabitants.
Since fading and weathering are inevitable results of any structure, community care is essential to preserving the quality of life inside the community. Upholding the community’s intended lifestyle and promoting availability and open communication are crucial.
Western Australia’s strata properties face particular maintenance challenges, including those related to waste management, fire safety, plumbing, electrical system maintenance, public areas, building facade, and landscape design. Maintaining these spaces on a regular basis contributes to the general well-being, structural integrity, and aesthetic appeal of the community.
Upkeep of a townhouse community necessitates a blend of individual homeownership, collective accountability, and efficient maintenance techniques. These problems can be resolved so that communities can continue to offer top-notch living conditions and draw in new people.
Living in a townhouse has several advantages, such as less maintenance, shared amenities, and a feeling of community. Although they are sometimes disregarded when choosing a place to live, townhouses have a number of benefits over single-family homes.
Townhouses have a number of benefits, chief among them being that they require less maintenance than single-family homes because landscaping is maintained by the community organisation. This removes the requirement for yard work and upkeep duties. Additionally, townhomes give residents access to common areas features including playgrounds, dog parks, tennis courts, clubhouses, gyms, and picnic areas.
Another benefit of living in a townhouse is value for money. In the same neighbourhood, condos are typically less expensive than single-family homes, and owners of townhomes are spared from paying high property taxes. Due to their smaller lots and less HOA dues, townhomes also usually have reduced property taxes.
Another benefit of townhouse living is the sense of community it fosters. Living close to one another through shared walls facilitates relationship maintenance. Another important consideration when selecting a townhouse is location. Townhouses are usually found in crowded, handy neighbourhoods with lots of adjacent dining, shopping, and entertainment opportunities.
Townhouses also provide more security because of their fences, security gates, and security systems. A home’s age, original condition, neighbourhood, and street address are all important considerations when creating a budget for repairs.
Content Summary
- Waterproofing a garage is essential, especially for detached or attached garages prone to moisture issues.
- Garages are often constructed with less stringent waterproofing measures compared to main houses.
- As garages are increasingly used for storage or living space, waterproofing becomes crucial.
- Tanking slurry is an effective and affordable method for waterproofing garage walls.
- This method prevents groundwater from seeping in and keeps garage walls dry.
- Proper waterproofing allows for versatile use of the garage, such as for storage or as a home office.
- Waterproofing options include crystalline concrete mix additives, epoxy or waterproof paint, and polypropylene floor tiles.
- Tanking is considered the most reliable method for waterproofing garage walls.
- Regular maintenance and updating of waterproofing systems are crucial for garage longevity.
- Waterproofing protects the garage’s internal structure from rust and maintains joint integrity.
- Effective waterproofing systems enhance customer experience in parking garages.
- Preventing water seepage into garages is vital for avoiding damage to vehicles and maximizing space usage.
- Various waterproofing techniques include sealers, sealants, and traffic coatings.
- The design of the garage influences the choice of waterproofing systems.
- In precast structures, joint waterproofing is critical to prevent water ingress.
- Cast-in-place garages require frequent maintenance of sealants and coatings.
- Concrete sealers penetrate the material, providing long-lasting protection.
- Joint sealants prevent water from leaking into different areas of the building.
- Regular replacement of joint sealants is necessary due to wear and tear.
- Expansion joints in garages require specialized waterproofing to accommodate physical movement.
- Traffic coatings are topical and protect concrete floors but may not be durable in the long term.
- Traffic coatings can degrade from winter maintenance and obscure concrete damage.
- The first step in waterproofing garage walls is identifying the source of moisture.
- Excavating a trench around the foundation is necessary to expose the problem area.
- Pressure washing the foundation and footing helps reveal cracks and holes.
- Filling cracks with a cementitious water plug and sealing the foundation wall is crucial.
- Liquid rubber sealant should be applied thoroughly to the entire foundation wall.
- Installing a French drain involves laying a perforated pipe in a gravel-filled trench.
- The French drain system collects rainwater and keeps it below the foundation level.
- Connecting the French drain to a stormwater drain ensures proper water diversion.
- Grading the trench slope correctly is vital for effective water drainage.
- After waterproofing, inspect the garage for potential mold growth due to poor ventilation.
- Cleaning and removing mold is important for health and safety.
- Garages require waterproofing maintenance to prevent structural damage.
- Waterproofing enhances the usability and versatility of garage spaces.
- A well-waterproofed garage adds value to a property.
- Choosing the right waterproofing method depends on the garage’s construction and use.
- Waterproofing is a proactive measure to protect garages from environmental damage.
- Regular inspection and maintenance of waterproofing systems are necessary.
- Waterproofing prevents common issues like water seepage and dampness in garages.
- The effectiveness of waterproofing impacts the overall condition of the garage.
- Implementing waterproofing solutions is a cost-effective way to protect a garage.
- Properly executed waterproofing ensures the longevity of garage structures.
- Waterproofing is an essential aspect of garage maintenance and care.
- It’s important to address waterproofing issues promptly to avoid further damage.
- DIY waterproofing solutions can be effective for minor garage moisture problems.
- Professional waterproofing services may be required for extensive issues.
- Waterproofing garages is an investment in the property’s long-term health.
- Understanding the basics of garage waterproofing helps in choosing the right approach.
- Waterproofing enhances the functionality and safety of garage spaces.
Frequently Asked Questions
Why Is It Important To Waterproof Garage Walls?
Waterproofing garage walls is crucial to protect the structure from moisture damage. Moisture can lead to mould growth, rot, and deterioration of the walls, compromising the integrity of the garage and its contents.
What Are The Common Signs That My Garage Walls Need Waterproofing?
Signs that your garage walls may need waterproofing include:
- Visible water stains.
- Peeling paint or wallpaper.
- A musty odour.
- The presence of mould and mildew.
If you notice any of these signs, addressing the issue promptly is essential.
What Are The Different Methods For Waterproofing Garage Walls?
There are various methods for waterproofing garage walls, including applying waterproof paint or sealants, installing a vapour barrier, using waterproof membranes, or applying waterproofing coatings. The method you choose depends on your budget, the severity of the moisture problem, and your specific needs.
Can I Waterproof My Garage Walls As A Diy Project, Or Do I Need Professional Help?
Waterproofing your garage walls can be a DIY project if you have the necessary skills and tools. Simple tasks like applying waterproof paint may be manageable for homeowners. However, for more complex waterproofing methods or severe moisture issues, it’s advisable to consult a professional waterproofing contractor who can assess the situation and recommend the most suitable solution.
How Often Should I Apply Waterproofing To My Garage Walls?
The frequency of reapplying waterproofing to your garage walls depends on the type of waterproofing method used and environmental factors. You should inspect your garage walls regularly for signs of moisture damage and reapply waterproofing as needed. Some products may require reapplication every few years, while others provide longer-lasting protection. Always follow the manufacturer’s recommendations for maintenance.