Because we are knowledgeable in this area, we are aware of how essential it is to preserve the structural soundness and aesthetic appeal of your property.
This article will offer you helpful ideas as well as step-by-step directions to efficiently repair and restore the outside plaster walls of your home, regardless of whether you are a homeowner or a contractor.
It is crucial that we gain an understanding of the nature of exterior plaster walls before we begin the process of repairing the damage.
Plaster is a substance that is both versatile and long-lasting, and it is typically used for completing walls and ceilings.
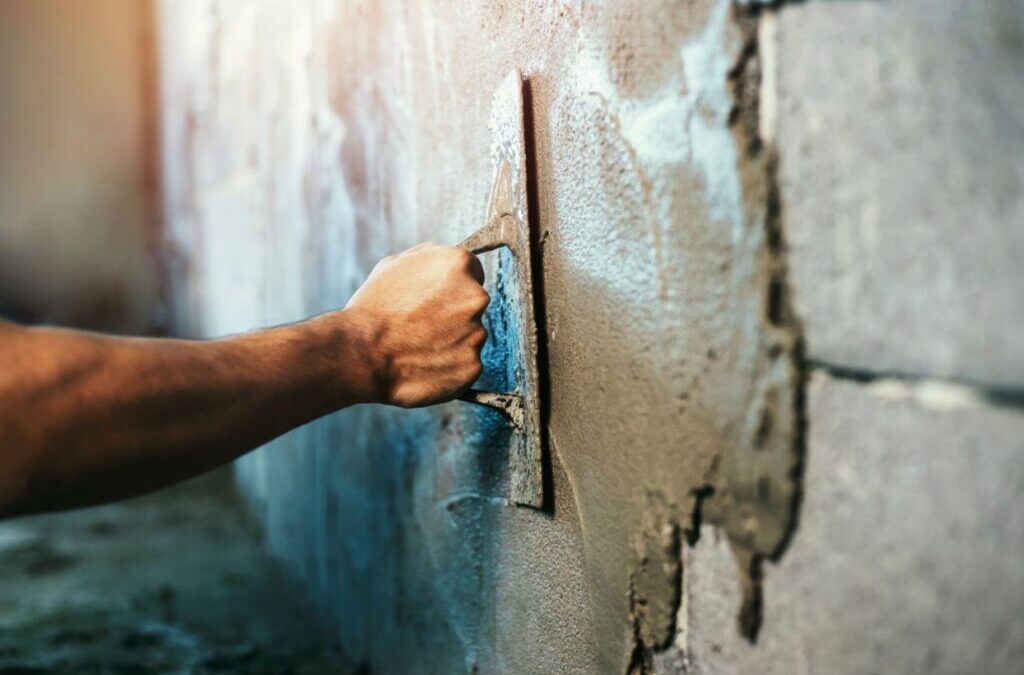
Stucco, another name for exterior plaster, is a coating applied to the exterior of structures to serve both as a protective and ornamental layer.
It improves the overall aesthetic appeal while at the same time protecting the underlying structure from the effects of weathering and other environmental elements.
Plaster Crack Repair: An Overview
Plasters are frequently the material of choice for homeowners who want to ensure that their walls retain their sheen and their durability throughout time.
The house is pristine, thanks to the plaster walls, which also add exceptional value to the property.
They are attractive and sturdy enough to serve as a reliable support structure for a house.
Plaster is an excellent material for use in home construction, but it is susceptible to cracking under certain conditions, including shifting weather patterns and other factors.
Plaster can experience knocks and dents in the normal course of everyday life.
Cracks are more prone to appear in some regions, such as the sections that are near windows and doors.
These are some of the areas that are at risk.
Even a single crack in these walls can have an unsightly appearance, but it is possible to repair them.
It is feasible to repair the crack that has appeared in the plaster walls with only a simple patch.
Reason for Cracks in Plaster Walls
It is essential to perform the appropriate measures when fixing a crack in a plaster wall; otherwise, the wall will continue to crack even after the repair has been made.
Plaster walls can develop cracks for a variety of causes, some of which are recognised while others remain a mystery.
Some of the known reasons include the following:
- The walls may develop unknown cracks as a result of normal wear and tear.
- This may be the result of meteorological factors such as an abundance of rain, which might make the area more susceptible to humidity.
- Other problems, such as a leak in the water supply or an obstruction in the pipe, can also be common causes of such splits.
- One of the most evident causes of these cracks is the use of low-quality plaster.
- Other causes may include the strain that day-to-day activities put on the wall, such as drilling holes for wall hangings, spilling liquids, and scratching caused by wall decorations and furniture.
Regardless of what caused the cracks in the plaster walls, it is simple to make repairs to any of the affected areas.
It is feasible to rapidly repair a fracture in a plaster wall by following a few straightforward steps.
What if the Cracks Are Severe?
It is easy to provide a speedy cure for little cracks that one may detect in plaster walls, but sometimes large cracks in plaster walls might be caused by unknown reasons.
This can sometimes be remedied.
Walls may develop serious cracks for a number of reasons, including earthquakes and adjustments made to draw house plans previously.
When there are obvious signs that plaster walls have structural problems, the best course of action for plaster wall repair is to get in touch with a trained and experienced specialist as soon as possible.
It is imperative that one does not put off repairing such walls because doing so could potentially cause more structural harm to the home.
There are major cracks in the plaster wall, but an experienced building professional may come to the property, assess the wall, and advise the homeowner on the best way to repair the damage.
How to Fix Cracks in Plaster
Prepare the Room
Before beginning, it is important to protect the floor by covering it with drop cloths made of plastic and tape them down using painter’s tape.
This will protect the floor from any plaster or joint compound that is accidentally spilt or splattered, and it will also make the clean-up process easier, as the majority of the dust from the sanding will settle on the drop cloths.
To prevent sanding dust from entering your heating, ventilation, and air conditioning system, seal off the area using plastic sheeting and painter’s tape, and cover any vents.
Smooth and Patch
Using a putty knife, smooth the area around the crack and remove any loose plaster fragments as well as any rough edges that may be present.
You can use a cloth or a rag to remove dust and other particles.
Use a spray bottle filled with water to wet the area down.
In a large bucket, mix dry plaster with water in accordance with the instructions provided by the manufacturer.
Plaster is best mixed in a mud pan, so empty the bucket’s contents into one.
Plaster the fissure with a layer of plaster using a wallboard knife measuring 4 inches in length.
Ensure that the layer is even with the rest of the wall. When repairing cracks, one layer of plaster is typically sufficient.
The area needs to be allowed to dry for a full day.
Fix the Lath
Lath should be replaced if any lengths are missing, and all parts should be refastened. Make sure to use drywall screws, and always drill pilot holes to prevent the wood from cracking.
If there is no stud available to anchor a lath end, slide a piece of lath into the hollow and screw it to the rear of the existing ones, aligning it with the studs.
After that, you can attach new or loose lath to it by screwing it into place as though it were a stud.
Safety Alert!
When plastering, it is important to protect your eyes and skin by donning safety goggles, a shirt with long sleeves, and cotton work gloves.
When breaking up dried plaster or combining it, you should protect your lungs by using a respirator designed for sanding.
Helpful Tips
Plastering can be negatively affected by excessive moisture in the wall or room; thus, it is important to repair any leaks or other sources of moisture at least a few weeks before plastering.
Plastering should be done at temperatures between 55 and 70 degrees Fahrenheit for optimal results.
Maintaining this temperature in the space for at least 24 hours before applying plaster guarantees the walls are totally dry.
The temperature in the room must be maintained at this level while the plaster is being applied and until it has completely hardened.
Repairing cracks can also be done with spackle and joint compound, respectively.
You can use spackle to repair even the tiniest of cracks.
Apply the putty in little amounts with a putty knife that is 2 inches long until the crack is covered.
Wait for the amount of time that the manufacturer specifies before touching the spackle again.
Sand it till it’s smooth. A joint compound is an option for wider cracks that need to be repaired.
To begin, run a piece of fibreglass wallboard tape that has a self-adhesive backing across the whole length of the fissure.
This will assist in preventing the crack from becoming any larger.
Apply the joint compound over the tape using a wallboard knife measuring 4 inches in length until the tape is fully covered.
Your coverage should be feathered out about 3 inches all the way around the area that has been taped so that it will blend in with the rest of the wall.
After it has had time to dry, use sandpaper with a very fine grain to smooth it out.
Apply a second coat of joint compound, then feather out this layer so that it extends 6 inches to 12 inches beyond the area that was repaired.
This will help the compound blend in even more.
Let it dry out once more before moving on to the next step.
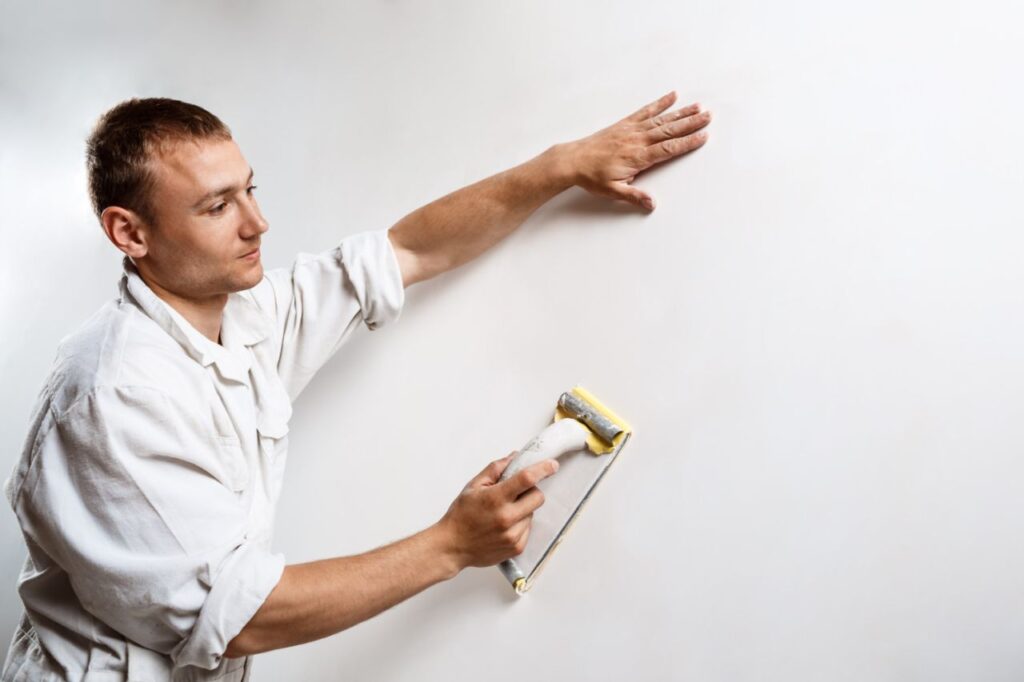
Sand, Prime and Paint
Sand the repaired area with a piece of sandpaper with fine grit until it reaches the desired smoothness.
Use a moist towel to remove the dust and debris the sanding process leaves.
After cleaning the patch with a damp sponge, paint the area with True Value EasyCare Ultra Premium Interior Primer/Sealer and wait for it to dry completely before moving on to the next step of your painting project: applying the paint base coat.
Repairing Cracks in Plaster Walls
Drilling the Plaster
Make an effort to expand the crack by utilising a safety knife and safety glass.
In order to accomplish this, you will need to reduce the spacing to 1/8 of an inch.
When one makes this cut, they are required to remove the excess material.
Sealing the Area
In the second stage, you will need to put on gloves and use a spray pump in order to apply a coating of acrylic conditioner. Spray the edges, and make sure they are clean.
Now, wait for sufficient time to pass so that the milk conditioner can become well absorbed into the wood and plaster.
This should take ten minutes to complete.
Injecting the Adhesive
After that, you need to inject the creamy glue into the holes.
A nozzle for an adhesive tube can be used to do this.
To fill the primed hole, you simply need to hold the tube in a careful and gentle manner.
Now, all that must be done to clean the wall is to scrape off the leftover glue.
You can accomplish this with the help of a damp sponge.
Clamping the Wall
It is now time to place a plastic washer approximately 2 inches in diameter in each filled hole. Using a drywall screw will allow you to do this task.
The screw and washer work together to generate a screw head that is flush with the gripping surface.
The screw helps draw the laths out of the plaster.
Washers are required to be placed on either side of cracks that are required to be at least 8 to 10 inches away from one another.
Wipe the Excess Adhesive and Wait
When you are finished, it is important to remember to remove any extra adhesive; otherwise, it may dry up and appear awkward.
For this purpose, a damp sponge can be used.
After a couple of days, remove any scraping adhesive and the washer and screw holding them in place.
This will ensure that you get better results.
Filling the Cracks
At long last, the surface is even enough to allow repair work.
Now build a composite material to fill the space by mixing together batches of various different joint compositions.
Applying the compound in order to fill in all the holes now.
After it has been applied, it will start to become more rigid over time.
Always keep in mind the importance of maintaining a sleek appearance.
It is recommended that a trowel be used in order to smooth up the compound.
It can be made smooth again by wetting it and working it.
Paint the Area
Wait until the area is completely dry before proceeding.
Following the completion of the compound’s curing process, the next and last step is to paint it.
Remember to give the area a light sanding with sandpaper before you begin painting it. Sandpaper is a useful tool for smoothing off any bumps or ridges that may be present.
Now you should put on the primer, and after that, you should paint it.
If additional coats are required, apply them and then wait for the completed project to be evaluated.
It’s likely that the cracks have been repaired by now.
How to Repair Holes in Plaster
Remove Damaged Plaster
Take off the damaged plaster by chipping it off the wall with a cold chisel and a ball peen hammer.
This will remove the damaged plaster.
Be careful not to chip too aggressively, or you will end up damaging the lath, which is the wooden structure the plaster supports.
Make the inside borders of the hole as smooth as possible with a utility knife.
Apply Latex Bonding Agent
Applying a latex bonding compound with a paintbrush to the exposed plaster and lath will prevent the dry plaster and lath from absorbing excessive moisture. It will ensure the integrity of the surface.
Enquire a True Value hardware shop staff member about the correct bonding agent to use with the plaster in your home.
Apply and Cross-Scratch Plaster
A plaster should fill the hole, and a wallboard knife measuring 10 inches should be used.
Scratch a cross pattern into the first coat of plaster just as it starts to harden so that the second coat will adhere better.
Scratching or scoring the first coat using a putty knife or another tool with a blade to create shallow grooves in either the vertical or horizontal direction before to applying the second coat is an effective method for facilitating the formation of a strong bond.
Apply Second Layer
After allowing the first layer to cure for a full day, apply a second coat of paint and then spritz the surface with water using a spray bottle.
Apply a layer of plaster that is 3/8 of an inch thick over the hole, and then cross scratch as you did before.
Additionally, this layer needs to dry for a full day.
Apply Layer of Joint Compound
After the second coat is dry, apply the joint compound using a wallboard knife that is 10 inches long.
To make the patch blend in with the rest of the wall, feather out the coverage approximately three inches around it, just like you would if you were repairing a fracture in the wall.
After allowing it to dry, use sandpaper with fine grit to hone it to a smooth finish.
Apply a second coat of joint compound, then feather out this layer so that it extends 6 inches to 12 inches beyond the area that was repaired.
This will help the compound blend in even more.
This topmost layer has to be painted on very lightly so that it will blend in with the wall, and then it has to dry for a whole day.
After the area has been allowed to dry thoroughly, wipe it off with a moist sponge, and then use sandpaper with a fine grit to sand it until it is smooth.
You can now prime and paint the surface.
How to Repair a Lath
In certain circumstances, you could be required to repair the wood lath that is located behind a hole.
If this is the case, then proceed as described below.
Insert Metal Lath in the Hole
If the lath that is behind the hole is damaged, remove the damaged wood by sawing it out with a keyhole saw or another similar cutting tool or by using a chisel and a mallet.
Lath should be replaced if any lengths are missing, and all parts should be refastened.
Make sure to use drywall screws, and always drill pilot holes to prevent the wood from cracking.
If there is no stud available to anchor a lath end, slide a piece of lath into the hollow and screw it to the rear of the existing ones, aligning it with the studs.
After that, you can attach new or loose lath to it by screwing it into place as though it were a stud.
A piece of metal lath, similar to a heavy screen, should have a wire loop inserted in the middle of it.
While maintaining a firm grip on the wire, insert the metal lath into the hole.
Then, while pulling the wire in the opposite direction, press the metal lath firmly against the interior of the hole.
Stabilize the Wall’s Edge
Drill holes around the damaged area using a masonry bit measuring 3/16 of an inch, spacing them every 3 inches and roughly 1 inch from the edge.
Drill until the bit comes into contact with the lath. If it does not go through, make a mark next to the hole with a pencil.
After that, you should spray plaster conditioner into the holes and then vacuum them.
After 15 minutes, use a squirt of plaster adhesive to fill in any holes that were not previously identified.
Remove any surplus with a cloth that has been dampened.
Wet the Substrate
Wet plaster will have its moisture drawn out by dry lath and the edge of the plaster that is exposed before it has a chance to set.
Applying a heavy coat of conditioner to the affected areas will stop this from happening.
Use a moist rag to clean up any drips or overspray that may have occurred.
Wait until the conditioner is completely dry, which should take about 20 minutes.
Apply the Scratch Coat
Plaster Magic mending plaster should be mixed in a clean bucket with cool water from the faucet until it reaches the consistency of natural peanut butter.
Spread the mixture over the lath and up against the old plaster edge using a margin trowel, as demonstrated in the image.
Maintain a gap between this layer and the original plaster that is equal to half its thickness.
Make the patch look more rugged by using a scarifier to scratch it, and then remove any blobs that are on the wall.
Trowel on the Second Coat
After waiting for the scratch coat to get hard to the touch, which should take approximately an hour, you should mix up a second batch of plaster to have a somewhat thinner consistency—more similar to buttercream icing.
Employing a plastering trowel, level the mixture so that it is flush with the surface of the wall; next, remove any surplus from the wall.
Please be patient and wait an additional hour for that coat to set.
Smooth the Top Coat
Scrape the patch area until it is smooth using a taping knife 6 inches long, then cover the patch with a thin coating of ready-mixed joint compound.
Allow to air dry over the night. After that, you should carefully scrape it smooth and apply another coat.
On the third day, apply a second coat, and once the first one has dried, smooth it out with a damp sponge in a gentle motion.
The patch can now be primed and painted when it’s ready.
Apply Plaster Over Lath
Wrap the metal wire snugly around a wooden dowel, making sure to press the dowel firmly against the wall as you work.
Plaster should be applied in layers until the hole is completely filled, and then the surface should be cross-scratched as it begins to set.
Distribute Joint Compound
After the area has had enough time to dry, take out the wooden dowel and use wire cutters to cut the wire.
After applying a very thin layer of joint compound, wait for it to dry completely for a full day.
After sanding the surface and cleaning it with a damp sponge, the area is ready to receive a coat of paint or wallpaper.
Conclusion
Plaster is a versatile and durable material used for finishing walls and ceilings, but cracks can occur due to climate changes and other environmental factors.
It is important to take proper steps to repair cracks in plaster walls, such as wear and tear, poor-quality plaster, stress, and structural issues.
To ensure a quick fix, preparing the room with plastic drop cloths and painter’s tape is important.
Close off the room, smooth and patch cracks, fix lath, wear safety goggles and respirator, keep the room at 55-70 degrees, use spackle and joint compound, and use self-adhesive fibreglass wallboard tape.
Apply joint compound, sand, prime and paint, widen cracks, seal area, inject adhesive, clamp wall, wipe excess adhesive, back out washer and screw, remove scraping adhesive, back out washer and screw.
Fill cracks with joint compounds, paint area, remove damaged plaster, apply latex bonding agent, apply and cross-scratch plaster, and wait for final results.
Apply a second layer of plaster, joint compound, and fine-grit sandpaper to blend in with the wall.
Repair wood lath behind a hole with metal lath and drill pilot holes.
Metal lath is inserted into a hole and pressed firmly against the inside.
Stabilize the wall’s edge with drill holes, spray with plaster conditioner, apply a scratch coat, smooth top coat, apply plaster over lath, distribute joint compound, and paint or wallpaper.
Content Summary
- How to Repair Exterior Plaster Walls Welcome to our comprehensive guide on how to repair exterior plaster walls.
- As experts in the field, we understand the importance of maintaining the integrity and aesthetics of your property.
- Whether you’re a homeowner or a contractor, this article will provide you with valuable insights and step-by-step instructions to repair and restore exterior plaster walls effectively.
- Before we delve into the repair process, it’s essential to understand the nature of exterior plaster walls.
- Plaster walls keep the house in prime condition and provide a unique value to the house.
- With just a quick fix, it is possible to repair the crack in the plaster walls.
- Reason for Cracks in Plaster Walls For repairing a cracked plaster wall, it is important to take proper steps, else it will continue to crack even after repair.
- It is possible to quickly fix a crack in a plaster wall by following simple ways.
- Reasons such as earthquakes or alterations in existing house plans may cause severe cracks in walls.
- When there are significant structural issues in plaster walls, it is always better to contact a qualified professional to repair the plaster wall.
- An expert building professional can visit the house to inspect the wall and provide the right solution for the repair of severe cracks in the plaster wall.
- Use a cloth or rag to wipe away dust and debris.
- Dampen the area with a spray bottle and water.
- Allow the area to dry for 24 hours.
- Keep the room at this temperature for at least 24 hours before plastering to ensure the walls are completely dry.
- Apply the joint compound with a 4″ wallboard knife over the tape until it is completely covered.
- Apply a second coat of joint compound and feather this layer out 6″ to 12″ from the repaired area to help it blend in further.
- Injecting the adhesive, Next is injecting the creamy glue into the holes.
- Now simply clean the wall by scraping off the excess glue.
- Clamping the wall Now, you need to insert a plastic washer of about 2 inches in the filled holes.
- Filling the cracks Finally, the area is smooth enough to repair.
- Now use the compound to cover all the holes.
- Paint the area Wait for the area to dry finally.
- How to Repair Holes in Plaster Remove Damaged Plaster Remove the damaged plaster by using a cold chisel and a ball peen hammer to chip the damaged plaster off the wall.
- Apply and Cross-Scratch Plaster Fill in the hole with plaster using a 10″ wallboard knife.
- Cross-scratch the first coat of plaster to help the second coat stick well as it begins to set.
- Distribute a 3/8-inch thick layer of plaster over the hole and cross scratch as before.
- Apply a second coat of joint compound and feather this layer out 6″ to 12″ from the repaired area to help it blend in further.
- How to Repair a Lath In some cases, you may need to repair the wood lath behind a hole.
- Stabilize the Wall’s Edge Using a 3/16-inch masonry bit, drill holes every 3 inches around the damaged area, about 1 inch from the edge.
- Drill until the bit hits the lath.
- Vacuum the holes and spray them with a plaster conditioner.
FAQ
Can Plaster Walls Be Repaired?
How to Fix Small Cracks in Plaster.
You can handle some small cracks with a two-coat process using a flexible patching compound, and no sanding is required.
Ensure that the crack is free of debris by scraping the putty knife over the crack.
Apply the flexible patching compound to the crack.
What Can I Use to Repair Outside Walls?
Concrete epoxy is a popular product used for filling in cracks on exterior walls that are made from concrete.
Depending on the size of the crack, the concrete epoxy will either need to be injected into the crack or worked in with a brush.
Can I Repair Plaster Myself?
If you have holes or cracks in your plaster walls or ceilings, repairing them is easy.
It requires more extra time and skill than patching a hole in drywall.
How Do You Fix a Crumbling Outside Wall?
Crumbling and cracked bricks can be replaced with newer bricks and then sealed back into place.
Additionally, deteriorating mortar can be replaced with tuckpointing — removing damaged mortar and replacing it with fresh material.
What Do Painters Use to Fill Cracks?
On interior wall surfaces like drywall and plaster, the material that gives the most inconspicuous repair is the joint compound. Joint compound comes in pre-mixed “mud”, as it is referred to, that comes in 1-gallon and 5-gallon buckets.