
Earthy plaster is a flexible and environmentally friendly substance that may improve the beauty and sustainability of your living spaces.
We are pleased to welcome you to our thorough tutorial on using earthy plaster.
In this post, we will delve into the different benefits and techniques of working with earthy plaster, allowing you to create magnificent interior finishes that are also kind to the environment.
Let’s get our feet wet and investigate the world of earthen plaster, shall we?
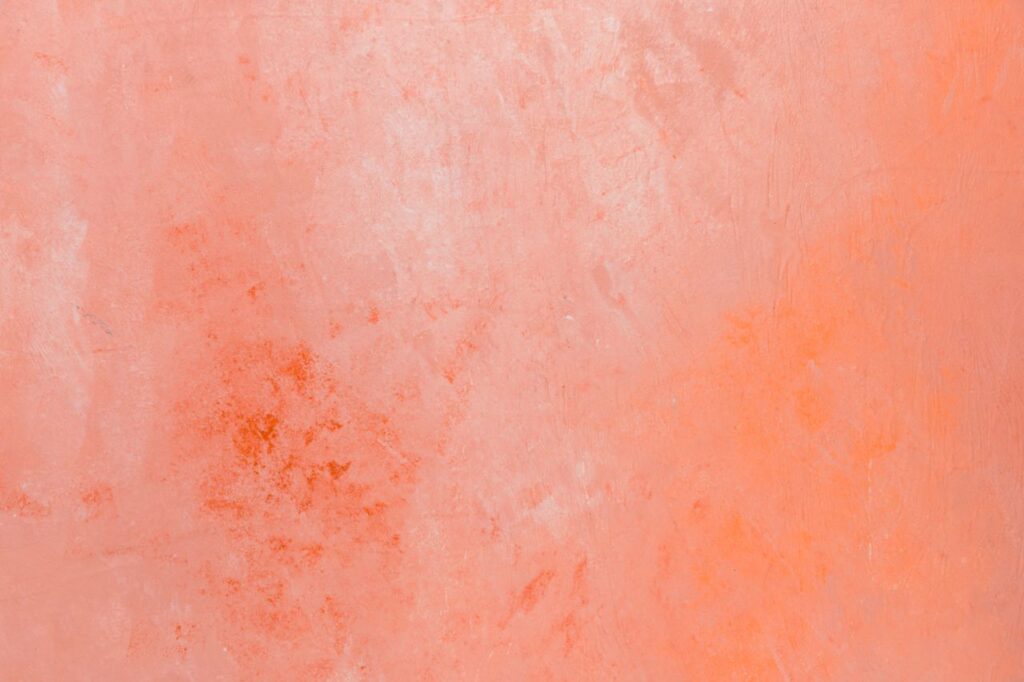
Plaster made from earth, commonly referred to as clay plaster, is a time-honoured building material that has been utilised for hundreds of years by a variety of different cultures.
Clay, sand, and various organic fibres make up this material, resulting in a finish that is both organic and permeable.
Earthen plaster, as opposed to traditional paints and synthetic plasters, offers a number of benefits, including an improvement in the quality of the air inside the building, regulation of the amount of moisture present, and a visually pleasing earthy texture.
What is Earthen Plaster?
Plaster can be broken down into three primary classifications: clay, lime, and gypsum.
Earthen plaster is a healthier and more durable alternative to traditional plaster.
It is made from clay.
Not only is it appropriate for use inside and outside, but it can also be sculpted and carved in relief.
This material is quite versatile.
Even though earthen plaster is a relatively simple type of plaster, it is a very versatile material that can be used to produce spectacular wall treatments on the inside of buildings.
It takes dye quite well and produces a wide variety of warm colours thanks to its adaptability.
However, it can also be modified to create walls with a rustic, undulating appearance and smooth finishes.
In the southwestern states of North America, such as Arizona, California, Colorado, and New Mexico, one time-honoured custom involves the application of earthen plaster to existing natural clay in order to create exposed wall surfaces.
On the other hand, its notoriety is growing in the northeast and other parts of Europe.
The History of Earthen Plaster
Plaster made from earth has a long and interesting history of use in the construction of traditional buildings in many parts of the world.
Earthen plaster has a much longer and more interesting history in other parts of the world.
The custom of enjarradoras may be traced all the way back to New Mexico, where it first appeared.
Each community had its own preferred spot for the plaster soil, and the techniques for working with this dirt were passed down through the generations from mothers to daughters.
In a similar vein, the application of clay plaster was traditionally seen as the domain of African women.
In fact, clay plaster is still utilised in embellishing their dwellings through the production of cultural relief work and paintings known as lima.
Unfortuitously, due to the invention of cement, a significant portion of this information was lost, and locations formerly known for plaster dirt have been forgotten.
Earthen plaster, on the other hand, offers a reasonably inexpensive and environmentally friendly alternative, which is why it is making a resurgence in contemporary building practices.
How to Mix Earthen Plaster
One part clay-rich soil to two parts sand is the basic formula for making your own earthen plaster.
However, a kind of fibre is required to reinforce the plaster, enhancing its strength and longevity.
Straw was traditionally used as an ingredient in clay plaster; however, other popular additives include animal hair, hemp fibre, bulrush fibre, and coconut fibre.
Because it gives the clay some much-needed flexibility, the additional fibre helps to prevent cracks from forming as it dries out, which is a problem that can occur otherwise.
One further essential component is an addition of some kind.
Additives are mixed into the plaster mixture to make it easier to work with and increase the plaster’s overall strength.
It is possible that these additives will only be added to the mixture for the final coat if the project calls for it.
These are some examples of common additives:
- Flour paste
- Compost Casein, which is a milk protein, linseed oil, ox blood, and prickly pear cactus juice are the ingredients.
Each additive brings its special benefits to the table, directly attributable to the additive’s composition.
For instance, aspects such as the amount of protein, fibre, enzymes, microorganisms, pH level, and minerals present.
All that is required to make coloured earthen plaster is the addition of mineral colours to the mixture.
How is Earthen Plaster Used Today?
Due to the unique qualities that it possesses, earthen plaster is frequently used in museums and galleries all over the world.
This is despite the fact that it is gaining popularity as an environmentally friendly building material.
As a result of the inclusion of clay in the plaster mixture, it possesses an exceptional capacity to keep moisture.
Consequently, the clay sops up any moisture that may be present and prevents it from reaching the structural components of the building.
By utilising clay plaster on the walls, museums and galleries can control the humidity levels within the space, safeguarding all of the artefacts and pieces of art housed there.
What Makes Earthen Plaster Eco-Friendly?
It has a finish that allows for the passage of vapour and may be recycled multiple times.
Plaster has very little processing done to it, but it is noted for its ability to purify the air.
It is able to keep the temperature inside at a consistent level.
It is easy to find earthen plaster that has already been mixed, but it is also possible to make it with components that are sourced locally or even on-site, such as clay, sand, fibre, wheat paste, manure, and juice from prickly pear cactus.
How to Make an Earthen Plaster
Plasters made from natural materials are appealing and beneficial for a number of reasons, but one of the most important reasons is that they encourage creativity.
Plasters created from natural materials, in contrast to drywall, can be shaped into relief sculptures, put to curving walls, and used in virtually any other type of artistic endeavour imaginable.
Plasters come in boards that are straight.
The majority of natural plasters fall into one of two groups: lime-based natural plasters or earthen natural plasters.
While there are a number of alternative procedures for applying natural plaster, most natural plasters may be categorised into these two categories.
Plasters made of earth typically have earth or soil as their primary component.
You may also need to add sand to your mixture in order to prevent cracking if your soil contains a high proportion of clay.
This will depend on the percentage of clay in your soil. When it comes to earthen-based plasters, you should aim for a ratio of 80 per cent sandy soil to 20 per cent clay soil.
Putting your soil, or your soil mixture that includes clay and sand, into a mason jar made of clear glass is a straightforward method for determining these ratios.
After adding water, shake the jar vigorously until the contents become a chaotic and hazy mixture.
When the mixture is allowed to settle, the heavier sand grains will fall to the bottom first, followed by the clay particles, which will land on top of the sand grains.
After about an hour and a half to two hours, you should see lines clearly defined where the sand ends and the clay begins.
You may need to add additional sand or more clay to your mixture by performing this straightforward process of separating the sand and clay that are already present in the soil.
Sifting all of your components through a fine screen, such as a window screen, is required before you can proceed with making your earthen plaster.
Either let the soil that you intend to use get dry and then crush it into a powder, or mix it with a paint mixer until it reaches the consistency of a runny milkshake, and then push it through the screen while it is still wet.
Both of these methods are viable options.
Before combining the sand and clay, you should separate them using a sieve.
You can do this either in a wheelbarrow or on top of a tarp, depending on which method you prefer.
After the sand and clay have been well combined, you will need to incorporate some kind of substance that contains fine fibres.
This could be cattail fluff or horse dung that has been filtered to a finer consistency.
The plaster is kept from cracking thanks to the fine fibres, which also help to keep the plaster together.
Finally, you need to add glue.
Wheat paste, which can be made by heating water and plain white flour in a saucepan until the mixture reaches the consistency of a runny milkshake, is one of the most straightforward “glues” that you may incorporate into an earthen plaster.
Add this glue mixture to your plaster mix until it is wet enough to be workable (remember, you are going for a consistency that is similar to that of a milkshake).
In order to apply an earthen plaster to a wall, you will first need to wet the wall thoroughly.
This will ensure that the earthen plaster will adhere to the substrate that is underneath it.
You may be happy with the finished product once you’ve applied multiple coats of plaster, each one with increasingly finer ingredients.
Applying Earth Plaster
After you have achieved a delectably smooth finish with the earthy plaster you have been mixing, it is time to apply it to your cob walls to sparkle.
Even if it appears to be a straightforward operation, there is a certain hidden delicacy that, once learned and perfected, will make the task far simpler.
Although I don’t claim to be an expert, I’ll explain how I went about plastering the inside of my cob home.
Earth Plaster Tools
When it comes to applying earthen plaster, the two most critical pieces of equipment you’ll need are your own two hands and a sturdy trowel.
A traditional American pool trowel and a Japanese trowel have their uses, but after comparing the two, I find that the Japanese trowel is superior.
Japanese Trowel
A Japanese trowel is more flexible than a pool trowel and thinner than the latter. Additionally, the form is considerably dissimilar.
The model shown above is the one I utilised; note that the point is quite helpful for manoeuvring into restricted access spaces.
For the sake of comparison, please find a photo of an American pool trowel below:
American Pool Trowel
That’s quite different. Whether you borrow or buy them, having a trowel in both a smaller and larger size is convenient.
Applying Earthen Plaster
Apply water to your walls using a pressure sprayer until you feel like the surface is completely soaked. (When I spray, I continue to do so until part of the cob runs down the face of the wall.)
It is essential that you obtain a strong bond established between the plaster and the wall.
While some people like to spray a little in advance and then return to plastering, I like to spray and plaster as soon as I can.
It’s hard to say whether or not it makes a difference.
After that, take handfuls of plaster and smear it onto the wall in a smearing motion.
It is up to you whether you want to choose a material that is rather hefty or one that is less heavy.
I began working on my interior with a smaller amount, but as time went on, I increased it.
If you apply your plaster too heavily, you run the danger of increasing the number of cracks in the surface.
Do some experiments.
When I was working in confined areas where it was difficult to spread plaster, I would grab little handfuls of the material and hurl it into tight corners, etc.
I did this most frequently in the nooks and crannies of windows and around the rafters in my ceiling.
Now it’s time to trowel… The more expansive your brushwork, the more efficiently the procedure will be completed.
It is possible that you may discover that you need to remove excess plaster that builds up on the steel as you glide over the wall with your trowel.
In this case, slop the additional mud off into a bucket as you travel along the wall.
Always make sure your trowel is spotless.
Maintain a consistent amount of pressure against the wall while not overworking the plaster.
It’s natural to want to get rid of every single stroke mark, but it’s not something that needs to be done. (You’ll be able to smooth things over with a burnisher at a later time.)
When it comes to applying plaster, troweling is where the real art resides.
Becoming skilled at this work requires the greatest amount of dexterity and consistent practice.
Take your time, pay attention to how you move your brush, and avoid repeatedly spending too much time working in the same spot.
Burnishing the Plaster
Burnishing the surface of your walls is the final step in the process of plastering them.
The walls will have an even smoother surface after you have burnished them, and you will also be able to eliminate any marks that were left by troweling.
I have tried using scraps of EPDM from my pond liner, which is flexible, and scrap pieces of another black plastic liner, which is considerably stiffer, as burnisher material.
However, I have discovered that the stiffer black plastic liner performs the best as a burnisher material for the majority of scenarios.
The texture of the burlap didn’t agree with me when I used it as a burnisher, even though I just tried it very quickly.
If it is at all possible, look for scraps of black plastic liner to use, but if not, use your ingenuity to come up with some other material that would work.
If there are any lines or marks in the plaster, you can get rid of them by going over the wall with a burnisher and using circular motions or gentle strokes.
Because it takes a considerable amount of time to do, make sure that you schedule enough time in your day to complete the task before the walls have excessive time to dry.
Burnishing the Plaster
When you are working on a huge plaster project that you know won’t be finished in one day, you need to give some thought to how you will handle the seams in the plaster.
My plaster job took four days to complete (I worked on it by myself for the first day and then with a friend for the next three days), so at the conclusion of each day, I sprayed the fresh plaster at the seam between it and the wall that had not yet been plastered.
I made sure that it was sufficiently wet so that I could pick up right where I left off the next day, and there wouldn’t be a discernible seam in the finished product.
Plastering is an art that requires patience and practice in order to feel truly out.
My expertise was rather limited before I started working on my own home, so please take the following ideas with a grain of salt.
Advantages of Using Earthen Plaster
Utilising earth plasters offers a wide variety of positive effects and benefits.
Because they are permeable, they allow the structure of a building to breathe and serve as a third layer of protection for the people living inside the building.
Plasters made from the earth have a ravenous appetite for water.
This indicates that they are able to control the relative humidity levels that are present in the air.
When the relative humidity levels are high, they are able to absorb and store moisture vapour within their molecular structure safely, and when the relative humidity levels drop, they are able to release it back into the atmosphere.
This device has two purposes: first, it ensures that the building’s occupants are breathing in air of high quality, and second, it prevents moisture damage to the building’s structure.
Clay will aid to prevent moisture from accessing elements that supply the framework of the building because of its insatiable appetite for water and its capacity to cling to it once it has it in its grasp.
In the event that these materials become wet, they will aggressively remove any moisture that is present there.
Because of this, earth finishes are the optimal choice for buildings constructed out of more pliable and breathable materials, such as wood, straw bale, and soil.
Because of these properties, earth plasters are now also being used in museums and galleries.
They help regulate humidity and, as a result, contribute to the preservation of both old and modern works of art.
The Museum Kuppersmuhle in Germany is a good illustration of this concept.
If earth plasters are created without the addition of any synthetic ingredients, they are completely non-toxic, making them an excellent option for people who are sensitive to various chemicals.
They are even able to absorb toxins that are present in other materials and bind odours, such as those caused by cigarette smoke, which results in a reduction in the levels of indoor pollution.
Investigations examining Germany’s potential to screen electromagnetic radiation, such as that emitted by computers and mobile phones, are now being carried out across the country.
Even though clay plaster is an older way of plastering, it has numerous advantages over newer methods of drywalling.
Earthen plaster is a far more environmentally friendly substance, as we have discussed in the past.
It can be made with relatively few resources and frequently incorporates a significant amount of recycled components into its composition.
The clay can then be easily reintroduced into the ground once it is no longer needed to meet requirements.
In a similar vein, because it is capable of managing humidity, it is an excellent choice for use as plaster in areas like bathrooms, basements, and kitchens, which are subject to varying degrees of humidity and temperature.
In addition, clay performs the function of a thermal mass, meaning that it absorbs coolness during the summer nights and releases it during the day in order to maintain a comfortable temperature.
This process is reversed during winter when clay functions as a heat sink.
This naturally occuring heating and cooling system helps enhance the energy efficiency rating of a room, which in turn can save some people money.
Plaster made from the earth is also less hazardous than traditional plaster and can help filter the air in a room.
It is able to accomplish this because the clay-based plaster does not need to be painted, which eliminates the requirement for an additional layer of paint that contains potentially toxic VOCs (volatile organic compounds).
Clay is naturally resistant to mould and mildew, which helps to keep the space smelling fresh and clean. This makes it an even healthier option.
The application process for earthen plaster is the only significant drawback to using this material.
Although the supplies might be much less expensive, the process of applying them takes a lot more time.
Because a significant amount of drying time is required between each layer, many constructors opt to stick with more contemporary methods.
On a more personal level and difficult to quantify, earth plasters typically have a pleasant feeling.
They are pleasing to the eye and can regulate temperature swings, resulting in walls that feel warm in the winter and cool in the summer.
They have the ability to round off and soften sounds, making the environment more serene and tranquil.
They, like the vast majority of materials derived from natural components, demand to be utilised in a manner that is respectful and suitable.
They are typically only generally favourable for use outside if they are located in a very protected region, utilised in a mostly dry climate, or used in connection with particular building design aspects, such as an outdoor wrap-around porch.
However, the conditions must be just right in all of these cases.
When manufacturing earth plaster from materials found on-site or in the surrounding area, the user needs to be prepared to play the role of their own private investigator, experimenting and “feeling” their way to a successful mixture through a process of trial and error.
They may be affordable to produce in this manner, but the preparation will require a lot of time and energy.
The other option is to buy ready-made earth plaster that has already been prepared and only needs to have water added to it before it can be used.
These will produce consistent and great results but can be more expensive (provided that all other necessary considerations are carried out effectively).
Conclusion

Earthen plaster is a versatile and eco-friendly material that can transform the aesthetics and sustainability of living spaces. It is composed of clay, sand, and various organic fibres, offering improved indoor air quality, moisture regulation, and a visually appealing earthy texture.
Earthen plaster is a relatively cheap, sustainable alternative to cement and is used to decorate homes and create cultural relief work.
Additives such as flour paste, manure, milk protein, linseed oil, ox blood, and prickly pear cactus juice are added for added benefits.
Earthen plaster is a vapour-permeable finish that can be reused for a long time and is eco-friendly.
It can be made using local or site-sourced materials such as clay, sand, fibre, flour paste, manure and prickly pear cactus juice.
Mix sand and clay, add fine fibre material, add glue, wet the wall, apply earthen plaster, use hands and a quality trowel, and use a Japanese trowel to get into tight corners.
The most important details are to wet the walls with a pressure sprayer, grab handfuls of plaster and smear it against the wall, apply steady pressure, and burnish the surface with a stiffer black plastic liner.
Burnishing the plaster is an art that takes time, and earth plasters are porous and have a thirst for moisture, providing high-quality internal air and protecting the building fabric from moisture.
They are ideal for structures made of softer, breathable materials.
Earthen plasters are used in museums and galleries to regulate humidity and protect works of art, are non-toxic and non-toxic, and have many advantages over modern drywall techniques.
Earthen plaster is a healthier alternative to paint but requires more time and effort to apply.
It is soft to the eye and works acoustically to create peaceful spaces.
Content Summary
- Tips for Using Earthen Plaster Welcome to our comprehensive guide on using earthen plaster, a versatile and eco-friendly material that can transform the aesthetics and sustainability of your living spaces.
- In this article, we will delve into the various benefits and techniques of working with earthen plaster, empowering you to create stunning and environmentally conscious interior finishes.
- The History of Earthen Plaster Earthen plaster has a particularly colourful history in traditional building construction around the world.
- For the rest of the world, earthen plaster, its history is a lot richer.
- However, as earthen plaster provides a relatively cheap, sustainable alternative, it is making a comeback to modern building practices.
- While earthen plaster gains momentum as a sustainable building material, it is often seen in museums and galleries on a global scale due to its key characteristics.
- Depending on the percentage of clay in your soil, you may also have to add sand to your mix in order to prevent cracking.
- To find these proportions, an easy technique is to place your soil (or your soil mixed with clay and sand) into a clear mason jar.
- Separating the sand and clay in the soil will help you determine whether you need to add more sand or more clay to your mix.
- Once your sand and clay are well mixed, you need to add some fine fibre material.
- Finally, you need to add glue.
- Add this glue mixture to your plaster mix until it is wet enough to be workable (again, you are shooting for a milkshake consistency).To apply an earthen plaster to a wall, you will have to get the wall enough to ensure it can stick to the substrate below it.
- Applying Earth Plaster Once you have mixed your deliciously smooth finish of earthen plaster, it’s time to apply it to make your cob walls shine.
- Earth Plaster Tools Your hands and a quality trowel are the two most important tools you’ll need to apply earthen plaster.
- Applying Earthen Plaster Wet down your walls with a pressure sprayer until they are sufficiently saturated. (
- Keep your trowel clean.
- Apply steady pressure to the wall, and try not to overwork the plaster.
- Burnishing the Plaster The last step in plastering your walls is burnishing the surface.
- I have very briefly tried using burlap as a burnisher but didn’t like the feel of it.
- With the burnisher in hand, go over the wall in circular motions or gentle strokes to remove any lines or marks in the plaster.
- Burnishing the Plaster If you are doing a large plaster job that you know won’t be complete within a day, it’s important to think about how you will deal with seams.
- Advantages of Using Earthen Plasters There are many benefits to using earth plasters.
- Earth plasters have a thirst for moisture.
- Earth plasters are now also being used in museums and galleries because of these characteristics to regulate humidity and hence help to protect old and new works of art.
- Despite earthen plaster being an older method of plastering, it has many advantages over modern drywall techniques.
- Similarly, its humidity-controlling properties make it a recommended plaster for bathrooms, basements and kitchens, rooms that experience variations in humidity and temperature.
- This natural heating and cooling system helps improve a room’s energy efficiency rating, saving money for some.
- In addition, earthen plaster is less toxic and helps to filter the air in the room.
- The only real downside to earthen plaster is its application.
- The materials may be significantly cheaper; however, it takes a much longer time to apply.
- On a more subjective and unquantifiable level, earth plasters generally feel good.
- Like most materials made from natural ingredients, they demand to be used respectfully and appropriately.
- If making an earth plaster from materials sourced on-site and/or locally, the user must be prepared to become his or her own detective, testing and feeling their way to a good mix through trial and error.
- The alternative is to purchase a ready-made, pre-manufactured earth plaster, which requires only the addition of water.
FAQ
What Are the Disadvantages of Clay Plaster?
Clay plaster binds moisture in the room, but if humidity exceeds a certain limit, the plaster won’t dry out.
As a result, it is not suitable for basements, damp rooms and the like.
Clay plaster is also not resistant to direct contact with water and rain.
How Long Does Clay Plaster Last?
Unlike any other material, clay plaster can be re-wet and reworked back into a monolithic whole.
New clay can be added to existing walls with solid results for hundreds, even thousands of years, and achieve the same levels of performance as when they were first applied.
How Long Does Clay Plaster Last?
Lath and plaster was a skilled craft and a time-consuming technique, and the advent of cheaper, mass-produced, pre-manufactured plasterboard meant lath and plaster largely fell out of favour by the 1930s and 1940s.
Plasterboard was simply faster and less expensive to install.
Why Does My Plaster Go Hard Quickly?
If the plaster is to be left for any period of time in a damp environment, it is possible for the humidity to affect how quickly the plaster will set in the future – so ensure any unused partial bags of plaster are kept in a polythene bag.
Is Clay Plaster Expensive?
Clay plasters will also cost more than traditional wall plasters, but bear in mind you won’t necessarily need to spend out on expensive paint finishes for a clay plaster wall, which may help to balance the budget.