Removing bathroom tiles can be challenging, particularly if you want to maintain the structural soundness of the plaster walls in the space.
If the walls are damaged during the removal process of the tiles, this might result in expensive repairs and additional work.
You may, however, remove bathroom tiles without causing any damage to the plaster walls that lie behind them if you take the appropriate approach and employ the appropriate techniques.
In this detailed tutorial, we will take you by the hand and lead you through the process, offering you helpful hints and advice along the way to ensure that you are able to complete this mission effectively.
Find out how to successfully remove bathroom tiles from plaster walls in a step-by-step approach without causing any damage to the plaster.
In order to ensure that your job of removing tiles goes smoothly and efficiently, make sure to follow our professional advice and procedures.
Is It Difficult to Remove Wall Tiles?
In order to access the wall or plasterboard and remove the tiles, you don’t need excessive talent, but you should prepare yourself to exercise some patience.
Be aware that in some cases, you might need to repair the wall afterward in order to get that smooth finish before you can retile the surface with your new tiles that look sleek and current.
Considering this, the amount of time and work you put into removing the tiles will directly correlate to the amount of time you will spend preparing the wall afterward.
Tools and materials you’ll need
The good news is that removing tiles from walls does not require a great deal of previous experience with do-it-yourself projects.
The task could take one or two days to complete, depending on the size of the project; nevertheless, you should be aware that these two days could be very messy!
It ought to be sufficient only to be mentally ready and to be in possession of the appropriate instruments in order to do the task successfully.
The following is a list of the equipment and supplies that you might require for the job:
- Eye protection devices
- Hard safety gloves
- Dust mask Hammer
- Pry Bar Blade scraper
- Or a tool for cutting grout
- Tile cutter
- Clippers and pliers for general use
- Tools, such as a screwdriver or chisel
- Knife for general use
- Large bin bag
- The use of a hot air cannon is optional.
Preparation Measures for the Work Area
Think about protecting any adjacent objects or surfaces, and cover any areas that shards of broken tiles could potentially cause damage to.
The following preliminary stages are necessary for removing tiles from either the kitchen or the bathroom, and they are the same regardless of where the tiles are located:
- If you decide to remove the tiles from your bathroom, be sure to cover the bathtub and all of the porcelain fittings and fixtures.
- In the kitchen, remove all the movable light furniture and put it somewhere else, then cover the counters, shelves, and bulky appliances with a strong material such as cardboard or bubble wrap.
- Dust and other microscopic particles can quickly make their way into the plumbing system, therefore, it is important to protect any drains and sink holes (in both the kitchen and the bathroom) from being clogged.
- It is also important to remember to safeguard the flooring, whether it is laminate, natural stone, or hardwood. Because heavy tiles that shatter easily could potentially damage the surface, just throw an old blanket or rug that you no longer use on top of it. This will provide some additional padding.
- It is important to note that if your renovation project involves the removal of tiled backsplash, it is a good idea to turn off the power to any electrical outlets that are located on the wall. This is something that should be mentioned here. You probably wouldn’t want to hurt yourself if it were even somewhat possible, would they?
Prepping the Bathroom
The removal of bathroom tiles can be a nasty procedure, therefore, careful preparation is very necessary.
First, you need to make sure that your tiles are as spotless as they can be.
This will make the removal process easier.
You need to remove everything in your bathroom that can be transported into another room.
In addition to this, you should secure plastic sheeting around doorways with tape in order to limit the dust as much as possible.
It is imperative that you remember to cover any heaters or grates in the area.
In addition to this, you need to check that you are dressed appropriately for the job in terms of safety gear.
Put on some long sleeves, some slacks, and some shoes with closed toes.
Kneepads, safety goggles, a dust mask, and safety gloves are also important items to have on hand if your profession requires you to spend a lot of time on your knees.
Cutting the Grout
Cutting the grout first is the most effective method for removing bathroom tiles while preserving the plaster wall that is located underneath.
This will assist in releasing the tile and making it simpler to peel away from the wall.
You might be able to remove the grout by cutting it with a chisel or a grout saw, but this will depend on the kind of grout you have.
If the grout you need to remove is more resilient, you might find that an oscillating cutting tool works best for the job.
Removing the grout is arguably the aspect of the operation that takes the most time, but if you do it correctly, it will spare you the arduous labor of breaking the tiles apart piece by piece later on.
You can use either a heat gun or a blow dryer to ease the removal of the grout.
After that, scrape it away with a utility knife and make sure to remove it all the way to the wall before you move on.
By doing so, you will be able to isolate each tile, allowing you to remove them more quickly and without causing any additional harm to the wall.
You need to get the job done as quickly as you can so that the wall you leave behind is nice and even.
Take your time and be careful while using any of these procedures to avoid making holes in the wall.
Continue to remove the grout until you are able to reach the edge of the tile and slide a putty knife beneath it.
Make Use Of The Heat Gun In Order To Relax The Grout
Even though wall grout is simple to remove, in the event that it becomes too difficult to remove, you can soften it by using a heat gun or blow dryer.
If you are only removing a tiny bit at a time, it is recommended that you warm up the ground line for at least thirty seconds before continuing.
Make A Clean Sweep Of The Grout Using A Knife
Although this process takes some time, there is a low possibility that it will damage the tiles that are located close.
If you can access a suitable holder, place your knife inside and maneuver it repeatedly and cautiously around the tile or tiles, you wish to remove.
Because wall tiles include lug spacers that connect neighboring tiles below the grout, a typical grout saw will not work for wall tile installation.
It’s possible that using a tiny rotary grinder to remove grout will be faster than using a knife to do it. However, if your hands slip, there is a greater possibility that tiles will be broken.
Adjust the tool to its lowest possible setting, and then move carefully along the grout line as you do so.
If you have genuine control over the tools or tiles, you should avoid breaking them when you nick them and instead think about increasing the speed of the rotor.
You can purchase a head attachment with an extra-small head to help you fit between the tiles.
Removing the Tiles
You need to decide whether you want to attempt to reuse your tiles or whether you are okay with discarding them.
Because there are a lot of pricey and high-quality ceramic tiles, you might choose to replace some of them somewhere else in your house.
If this is the case, you will need to remove the tiles with extreme caution so that you do not harm them.
Put your putty knife underneath one edge of the tile and work it in as far as you can.
This is the first step.
To loosen the tile uniformly, you will need to repeat the operation around each of the four sides.
Make a lever out of your putty knife by bringing the handle in closer proximity to the wall.
This will make it easier to peel the tile away from the plaster in a way that is effective and gentle.
It is necessary to repeat the operation of loosening and prying each of your tiles.
To find any loose edges in a complete wall’s worth of tiles, you should begin by tapping the corners of a few individual tiles.
This will serve as your point of departure.
The next step is to move the chisel behind the tile, then use the hammer to give it a light tap to provide pressure and get the tile to separate from the adhesive.
Doing it this way allows you to disassemble them without breaking any of them.
The first tile is typically the most challenging to remove, but once all of the tiles have been removed, the remaining work will be easier because the edges of the other tiles will be exposed.
It is important to remember that the aforementioned suggestions will assist you in removing tiles from the plasterboard without the risk of destroying them.
Take a close look at the plaster wall once you have successfully removed all of the tiles from the wall.
Tile removal may result in some cosmetic concerns, even though this process shouldn’t result in any significant damage.
You will likely need to chisel off some adhesive residue, and it may be a good idea to run over your wall with a putty knife and some spackle to smooth over any spots that have a slight texture.
After that, you may sand down your plaster walls and clean them so that they once again appear brand new.
Warm up the grout (this step is optional).
Grout from walls is normally not difficult to remove; however, if necessary, a heat gun or blow dryer can be used to soften hard grout.[3]
If you are only able to remove very small amounts at a time with the grout scraper, warm up the grout line for thirty seconds and then try again.
Break the Tiles
In the unfortunate case in which the tiles are immediately put into the mortar, you will be required to break the tiles up into smaller pieces.
Put on a protective eye mask because porcelain tiles can splinter into very pointed fragments if they break.
In order to minimize the number of broken tiles, you should use a chisel and a hammer to break the tiles from the side.
Carry out your labor in horizontal lines.
Clear off the Adhesive and Any Remains
It may appear to be an insurmountable task, but you may remove the adhesive and grout remnants off the wall using a cold chisel, utility knife, or tile cutter.
In preparation for installing the new tiles, you will want to ensure that the wall or plasterboard is level and even.
Use utility cutters or pliers to remove the spacer lugs from the connector.
It is possible that you will find the entire process to be intimidating and perhaps dangerous.
However, if you are dubious that you can complete the job by yourself and achieve the desired outcome, it is in your best interest to include professionals so that you may save time.
Steps To Remove Tiles Without Damaging Plasterboard
Safety Is the First Priority
When working on other tasks, including the removal of wall tiles, always keep safety at the forefront of your mind.
The most essential pieces of personal protection equipment you’ll require are a dust mask, a strong set of work gloves, and a pair of safety goggles.
Your eyes will be shielded from any flying shards thanks to the safety goggles, and your hands will be protected thanks to the gloves.
Any dust that may be floating in the air as a result of the removal procedure is captured by the mask and filtered out.
If you don’t already have these things, there’s no need to panic because you can find them at virtually any hardware store in the neighborhood.
Cover Surrounding Area
Before you go ahead and remove the tiles, you might want to give some thought to how you’ll keep the other area safe.
Because there is a possibility that the process would result in damage to the surrounding environment, it is necessary to cover the area with a large sheet in order to protect the sensitive areas from being harmed.
Cover the sink as well as any other porcelain appliances or accessories.
Cover the drains with tape as well, or otherwise, you’ll have to tile around them later.
Protect The Space
Providing enough protection against falling objects in the region immediately below the wall tiles will be necessary.
Damage that cannot be repaired may be caused if sharp pieces of tile break off of a wall and fall into a bathtub, shower tray, or even just the flooring below.
Protecting these areas against falling tiles is rather simple with the use of cardboard.
It is important to remove any packaging from items destined for recycling in the weeks leading up to the beginning of this task.
You’ll be shocked at how far dust and debris will travel as the tiles start to tumble down, therefore, it’s important to protect surfaces that are further away from the primary work site with dust sheets.
Remove The First Tile
As soon as you have put on the necessary protection gear (remember to wear shoes with closed toes), it is time to determine the most effective place to begin.
The most appropriate place to start is with a tile that is already beginning to come away or has some damage.
If you cannot discover a broken or loose tile, try to either loosen a tile or tap one with a chisel until it begins to break.
If this does not work, you will need to replace the tile.
Use a grout rake to scrape out the grout surrounding the tile until you have a gap large enough to wedge your chisel into.
Another option is to use a grout rake.
This is also an effective strategy to employ if you are attempting to save tiles for future usage.
When you start with a tile that is not damaged, you have more influence over where the game will begin, which is one of the many advantages of doing so.
Work from the top-left corner of your tiled area if you are right-handed, then move to the right as you work your way gently down the wall as each horizontal line of tiles is removed.
If you are left-handed, start from the top-right corner of your tiled area and work your way down.
People who write with their left hand should write in the other direction.
Lever Tiles Off The Wall
You are officially in business as soon as the first tile has been broken sufficiently to allow a chisel to be wedged between the cracks.
Put a chisel between the tile and the wall, and then use a soft-faced hammer or a rubber mallet to tap on the chisel to loosen the tile.
You may have to chisel in a few different spots and then use the chisel itself as a lever to force the tile apart.
The initial tile is almost always the most difficult to remove, but the tiles that come after it should be rather simple.
If you can get the chisel beneath the tile farther, you will have a greater chance of breaking it up into larger pieces when you remove it.
It is a very time-consuming process to chip away at the tile into very small pieces.
If you have any assistance available, you should request that they try to capture larger tiles before they hit the ground.
This is especially helpful if you are removing wall tiles made from heavy natural stone or large format tiles, both of which have the potential to damage the area underneath them no matter how well they are covered up.
Tidy Up The Wall
Do you intend to tile the inside of a shower or directly over the wall that you have just finished working on?
Removing any remaining tile glue is important to take a few moments immediately while the dust sheets are still in place and scrape them off.
The use of a chisel and a mallet can be used to remove any large chunks, and a tile scraper or sander can be used to smooth off any remaining roughness.
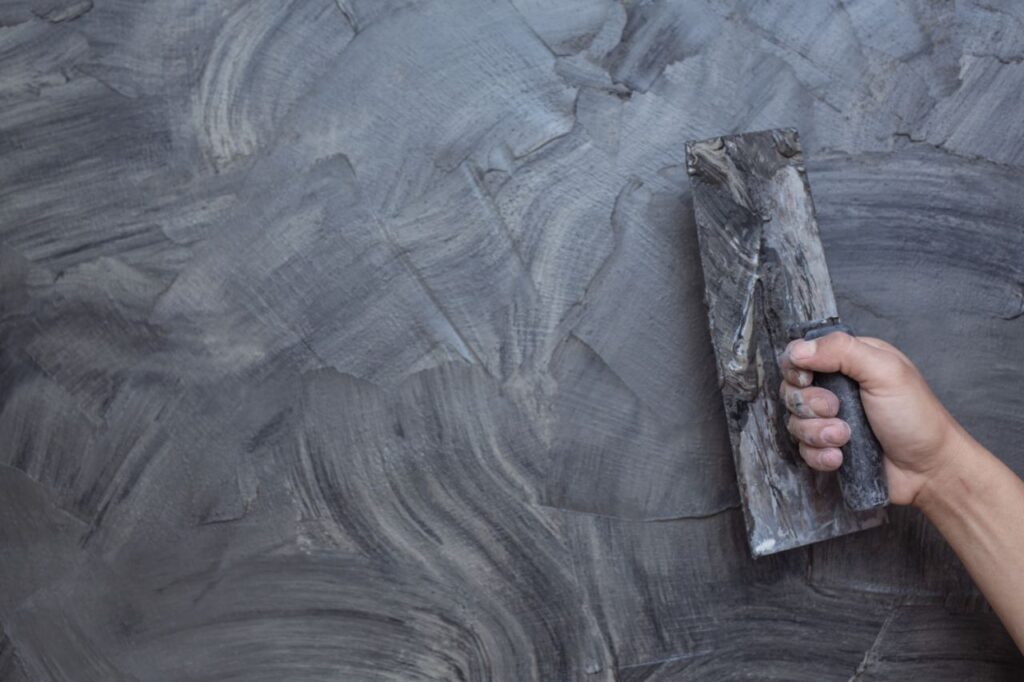
You may need to get any holes filled up and sanded if any plaster peeled off the walls when the tiles were installed.
Before you install new tiles, re-plastering a severely damaged and spotty wall is the best course of action.
Clean Up
Before dumping the contents of the dust sheets into a cardboard box, you should first collect the dust sheets from each of the corners and bring them outside.
When filled with heavy construction debris, even trash can bags designed for extreme durability have a tendency to rip.
The next step is to collect any stray debris that may have gotten past the dust sheets using a dustpan and brush.
Afterward, go over all the surfaces with a vacuum cleaner and then wipe them down with a moist cloth.
How Can I Remove Wall Tiles In One Piece?
From an ecological standpoint, It makes perfect sense to salvage tiles to resell or reuse them; nevertheless, mastering an advanced level of wall tile removal techniques requires the process, which will take a great deal of time.
A significant part of this equation will be determined by the design and construction of the tiles you are removing.
If they have a worn out, chipped, and obsolete appearance, and there is a low likelihood that they will be reused, then it is not really worth the effort.
The title, the adhesive, and the installation process all significantly determine how successful the project will be.
Larger porcelain tiles are more difficult to remove without breaking, particularly if they have been correctly fitted with a modern porcelain tile adhesive.
This makes it particularly challenging to remove larger porcelain tiles.
On the other hand, if you are removing tiny ceramic wall tiles (such as metro tiles) that have been fastened with “ready-mixed adhesive,” there is a good probability that you will be able to remove tiles without damaging them.
This is because ready-mixed adhesive is more forgiving than traditional adhesive.
The toolbox you use to remove tiles could benefit from including a grout rake.
Use it to scrape the grout away from all of the edges of the tile before carefully removing it from the wall using a gentle levering motion.
Because of its wider and flatter head compared to that of a chisel, a specialized tile scraper is an investment that is well worth making.
Conclusion
Removing bathroom tiles without damaging the plaster walls can be done with the right approach and techniques, but it requires patience and the right tools and materials.
The tools and materials needed for tile removal include safety glasses, gloves, hammer, pry bar, blade scraper, saw or grout cutter, utility clippers, pliers, screwdriver, chisel, large bin bag, and hot air gun.
Preparation measures include protecting objects and surfaces nearby, cutting the grout first, and wearing the right safety gear.
Depending on the type of grout, use a heat gun or blow dryer to soften the grout and use a utility knife to scrape it away.
Use a small rotary grinder if necessary, but don’t fracture when you nick them.
Decide if you want to reuse or toss out the tiles.
Remove ceramic tiles from the plasterboard without breaking them by using a putty knife, chisel, and hammer.
Chisel off adhesive residue and smooth over the wall with a putty knife and spackle.
Heat grout, break tiles, clear adhesive, and spacer lugs, get professionals involved, wear safety goggles, gloves, and dust mask, cover the surrounding area, and wear protective eye masks.
Protect the space from falling tiles with cardboard and dust sheets.
Remove the first tile with a chisel or grout rake. Lever tiles off the wall with a hammer or mallet.
Ask for help to catch bigger tiles, tidy up the wall, and clean up the dust sheets before installing new tiles.
Use a dustpan, brush, vacuum cleaner, damp cloth, grout rake, and specialist tile scraper to remove wall tiles without damaging them.
Content Summary
- How to Remove Bathroom Tile Without Damaging the Plaster Walls Removing bathroom tiles can be daunting, especially when you want to preserve the integrity of the plaster walls.
- Damaging the walls during the tile removal process can lead to costly repairs and additional work.
- However, with the right approach and techniques, you can remove bathroom tiles without causing any harm to the underlying plaster walls.
- Learn the step-by-step process of removing bathroom tiles without causing any damage to the plaster walls.
- Regardless of whether you are removing tiles in the kitchen or the bathroom, here are the preparation steps you need to follow: If you remove your bathroom tiles, then cover the bathtub and all the porcelain fittings and fixtures.
- This will help with the removal.
- You need to ensure you’re also wearing the right safety gear for the job.
- Depending on the type of grout, you may be able to remove it using a grout saw or chisel.
- A heat gun or a blow dryer will be helpful to soften the grout.
- Then, use a utility knife to scrape it away, and make sure you remove it down to the wall.
- Grout may be removed faster with a small rotary grinder than with a knife.
- Use your putty knife as a lever, bringing the handle closer to the wall.
- This will help pry the tile away from the plaster gently but effectively.
- Repeat this loosening and prying process on each of your tiles.
- Once you’ve successfully removed all of the tiles, take a good look at the plaster wall.
- Try to break the tiles from the side with a hammer and chisel to reduce the number of shards.
- Clear off the Adhesive and Any Remains To get all the adhesive and grout off the wall might look like an impossible job, but you may use a cold chisel, utility knife, or tile cutter to remove the remains.
- You would want to ensure that the wall or plasterboard is flat, even for laying the new tiles.
- Protect The Space The area directly below the wall tiles will need to be well protected from falling debris.
- Lever Tiles Off The Wall Once your first tile has been cracked sufficiently to wedge a chisel in, you’re in business.
- Insert a chisel between the edges of the tile and the wall, and gently tap with a hammer or mallet until the tile comes away.
- Chipping away at tiny shards of tile is tedious.
- Tidy Up The Wall Planning to tile in a shower or right back over the wall you’ve just worked on?
- While the dust sheets are still on, it’s worth taking a little time now to scrape off all remaining tile adhesive.
- Tap off any large chunks with a chisel and mallet, and use a tile scraper or sander to smooth down any remaining roughness.
- If any plaster has come off the walls with the tiles, you may need to get any holes filled and sanded.
- Even heavy-duty bin bags tend to rip when filled with heavy building waste.
- Salvaging tiles to sell or reuse certainly makes sound environmental sense, but it does take learning how to remove wall tiles to a new level, and the job will take a whole lot longer.
- The style and quality of the tiles you are removing will play a big factor.
- A grout rake is a useful addition to your tile removal toolbox.
FAQ
How Do You Remove Tiles Without Damaging Plaster?
Removing tiles from the plasterboard is the same as when you remove tiles from a wall.
Simply chisel the tiles off the wall using the chisel and hammer until the plasterboard is free of tile.
Does Removing Tiles Damage Plaster?
depends on how the tiles have come off, if you are lucky, all of the old tile residues may have come off without damage to the plaster, if not best to plaster for good results on tiling.
Can I Remove the Bathroom Tiles Myself?
Removing wall tiles and floor tiles is a relatively easy process, but it can also be hazardous.
Chips and shards of tiles can be very sharp, so wearing protective gloves and safety goggles is essential.
For the same reason, it’s advisable to wear a long sleeve top and to clear up tile fragments as you go along.
How Hard Is It to Remove Tile From Bathroom Wall?
Removing wall tiles is different and more difficult than removing floor tiles because wall tiles are typically set very close together, with minimal grout lines.
This means that it takes more care to remove a wall tile without damaging the surrounding tiles.
Is It OK to Tile on Plaster?
Tiling onto plaster is relatively straightforward, provided you have prepared properly and used the right tools and products.
Make sure you plan ahead to prevent any mistakes – take care with your setting out and ensure the surface is clean, dry, sound, and flat.